

Help Center / Smarter Voice / Advanced / Store call recordings
Advanced
Store call recordings for Business Phone
Please note - Call Recording is a Plan Specific Feature. If you would like to speak to an Account Services manager about this feature, please email experience@virtualpbx.com or call (888) 825-0800 option 3.
On this page
Pricing and Requirements
While VirtualPBX does not charge for storage on this service, note that Amazon S3 will charge for storage based on usage. Please review Amazon S3 pricing at https://aws.amazon.com/s3/pricing/. Your company must have an account in good standing with VirtualPBX and an active AWS account. If you don’t have an AWS account yet, you’ll be prompted to create one when you sign up for Amazon S3. To sign up for Amazon S3: 1. Go to https://aws.amazon.com/s3 and click Sign Up. 1. Follow the on-screen instructions. 1. AWS will notify you by email when your account is active and available for you to use. Private external storage cannot be enabled until your account is active. 1. Contact VirtualPBX Support to enable this feature.
Creating Your Bucket and Users
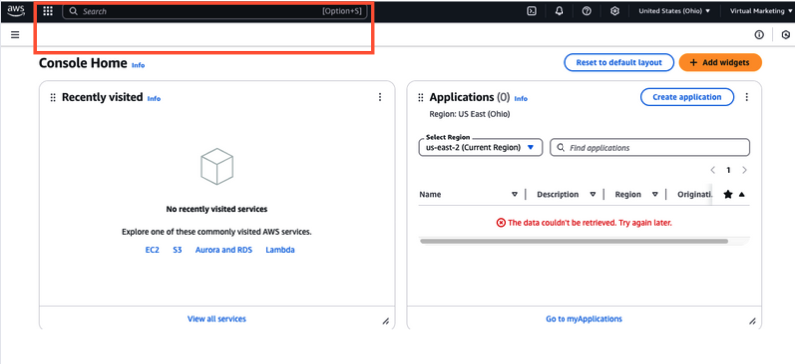
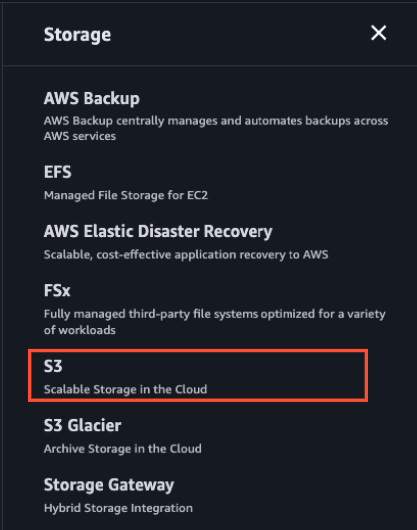
Once signed on to your account, go to the menu on the top, and click Storage, then S3.
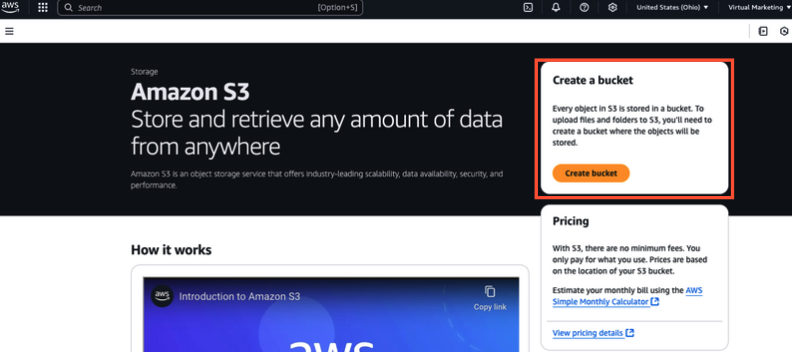
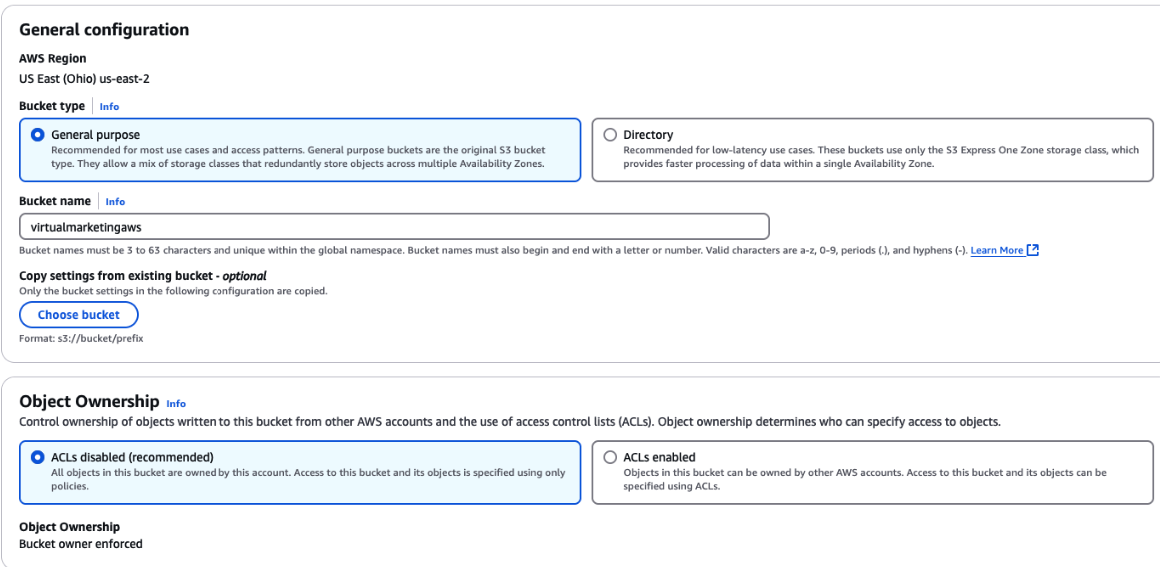
Click Create bucket, and give it a unique name. Keep the suggested choices for Bucket Type, Object Ownership, Block all Public Access, and Default Encryption.
Under Advanced Settings, you can choose to prevent the content from being deleted or altered for a fixed amount of time or indefinitely.
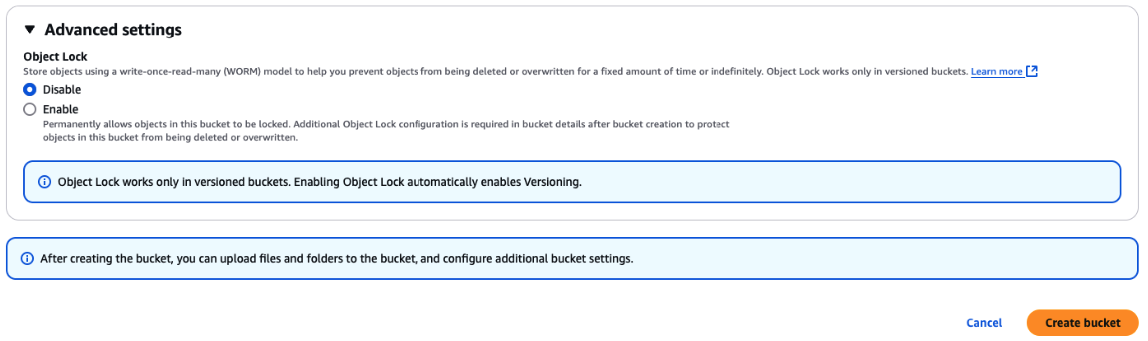
Once you’ve clicked ‘Create Bucket’ you will be able to view your new bucket.

After you’ve created your initial bucket, you will need to create a user and group before linking your bucket in VirtualPBX.
Creating a User and Group
At the menu up top, choose Security, Identity, & Compliance. Navigate to IAM
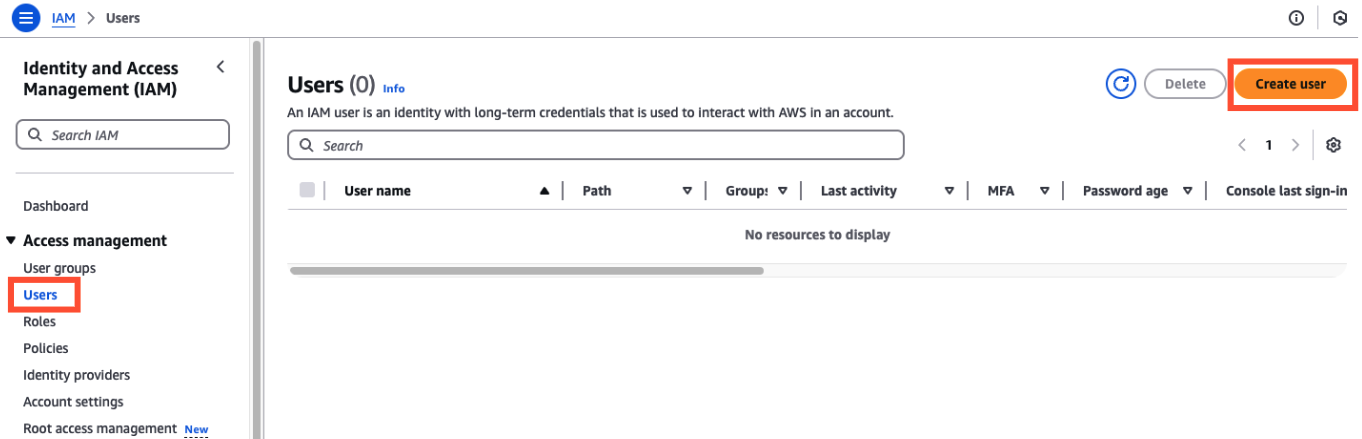
Users
Choose Create User
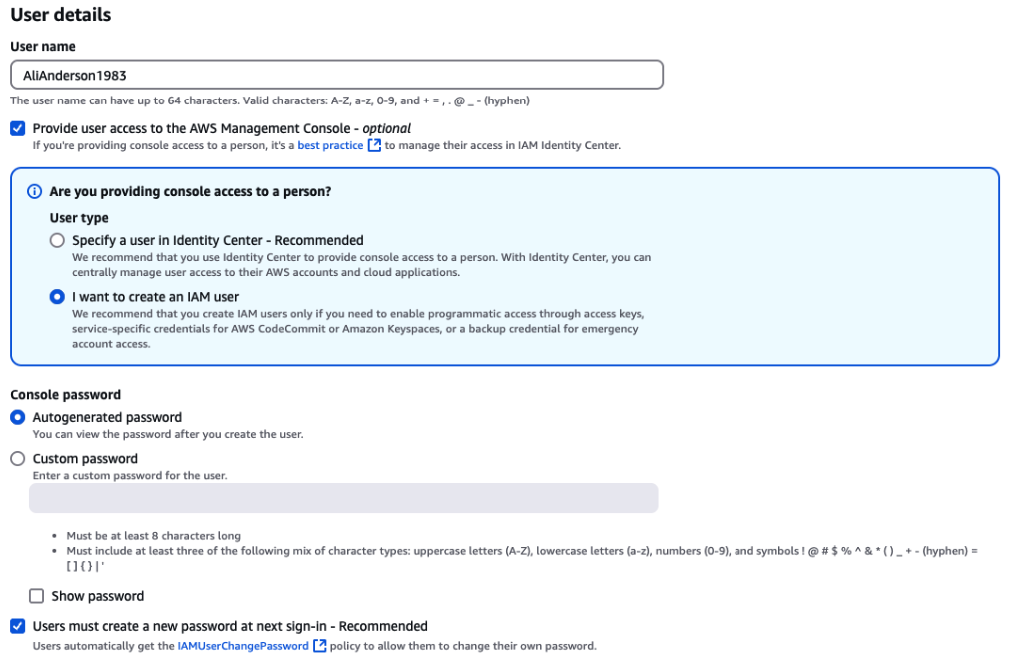
Provide the user access to AWS Management Console, and choose ‘I want to create an IAM User’
For permissions - Choose ‘Add user to group’, and create the group.
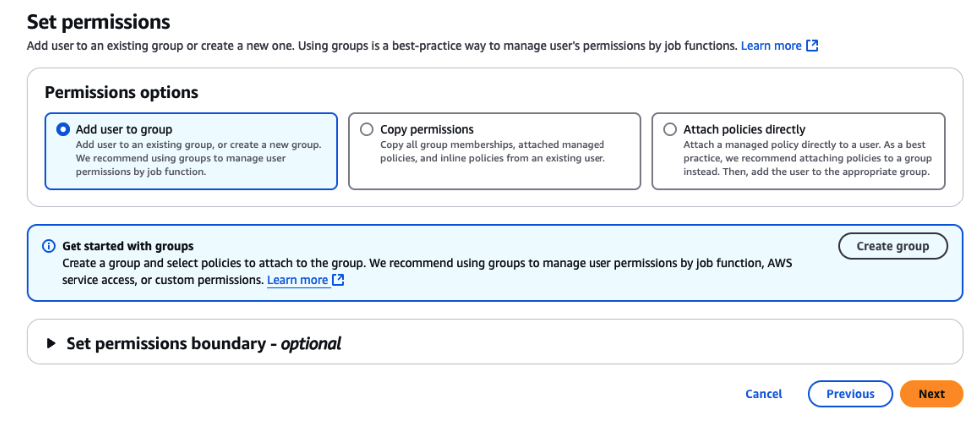
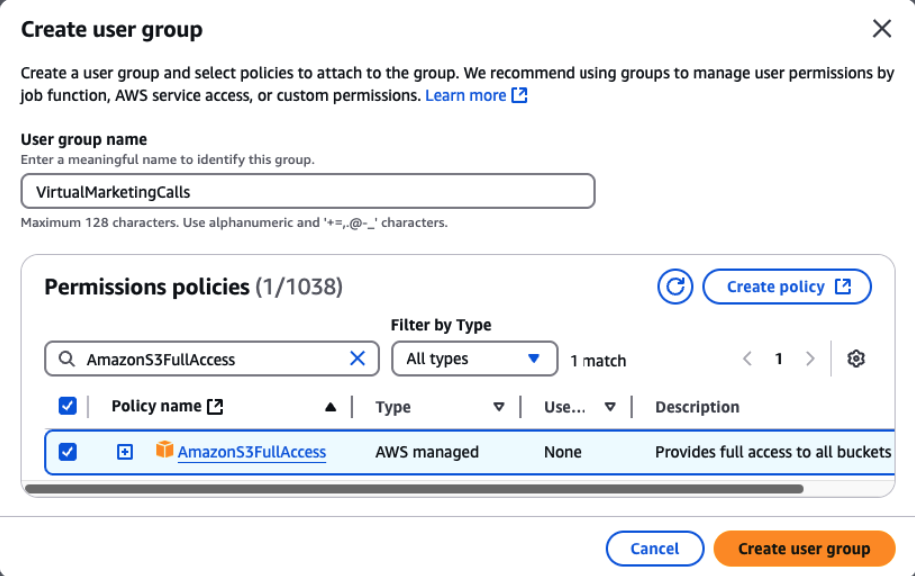
Under Permission Policies while creating a group, search and add AmazonS3FullAccess.
Create User Group.
Make sure your new user has been added to this group, then Create User.
Be sure to document the Access Key ID and Secret Access key provided after user creation - this will be needed when linking your buckets to VirtualPBX. You may also download a CSV for easy reference.
Creating Folders
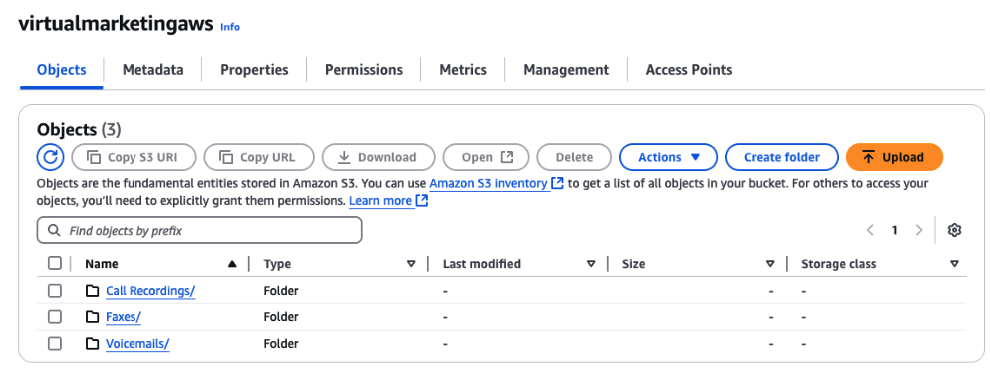
Navigate back to the S3 interface, and click in to your bucket. Add a folder for each item you will be storing through AWS. (This is usually Call Recordings, Voicemails, and Faxes).
Linking AWS to VirtualPBX
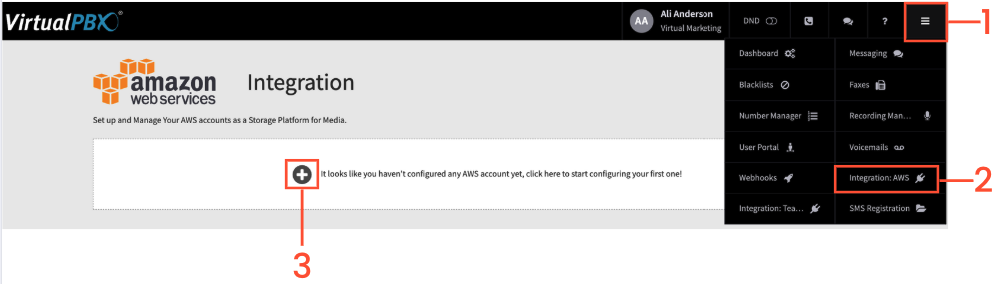
Click on the Menu Icon at the top right
Click on Integration AWS
Click on the + sign to configure your AWS account
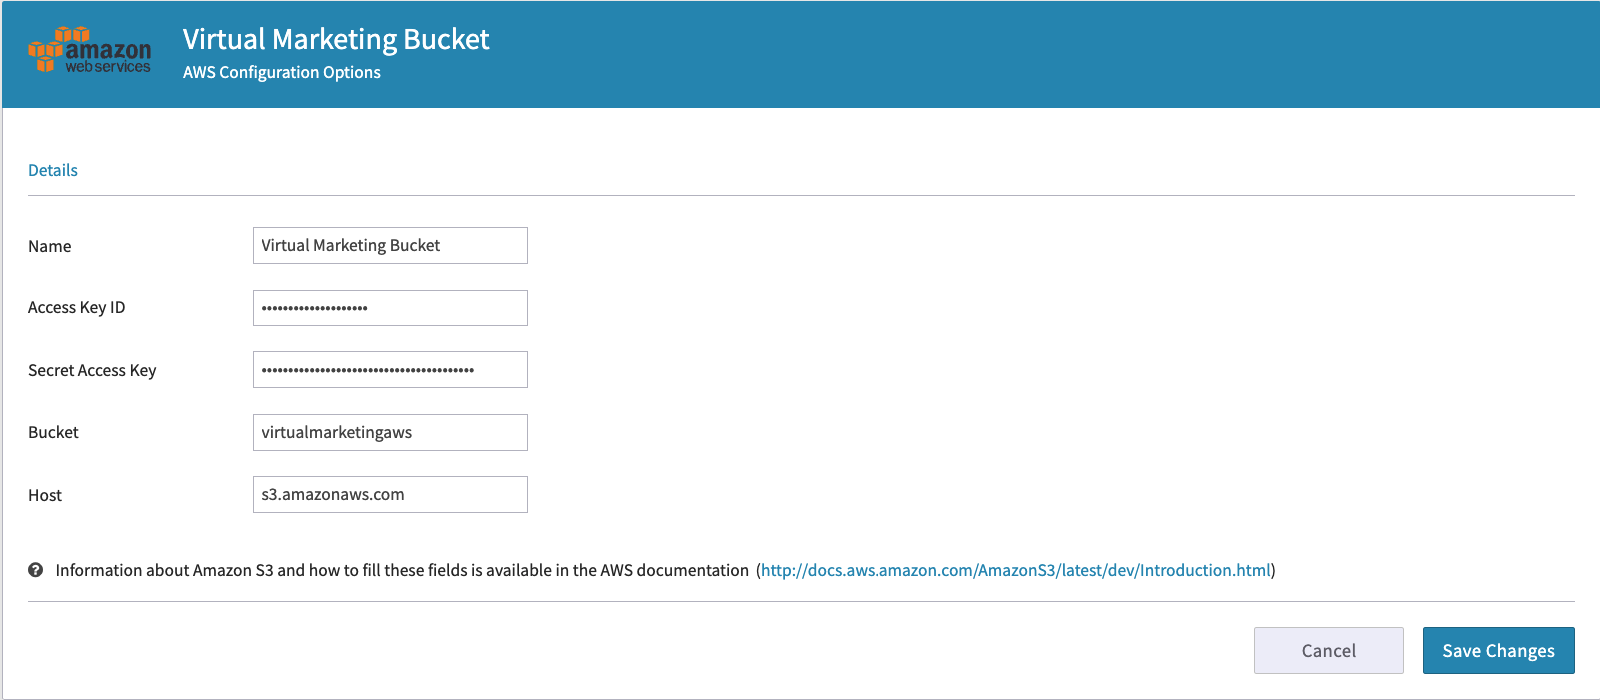
Fill out the form completely- your Access Key ID and Secret Access Kay were provided upon user creation. Your Bucket name is the unique name that you created at the beginning, and your Host will be s3.amazonaws.com
Click on Save changes
After your account has been created, you can link your bucket to the specific items that you created folders for. Hover over the three-line menu to choose which you would like to set up
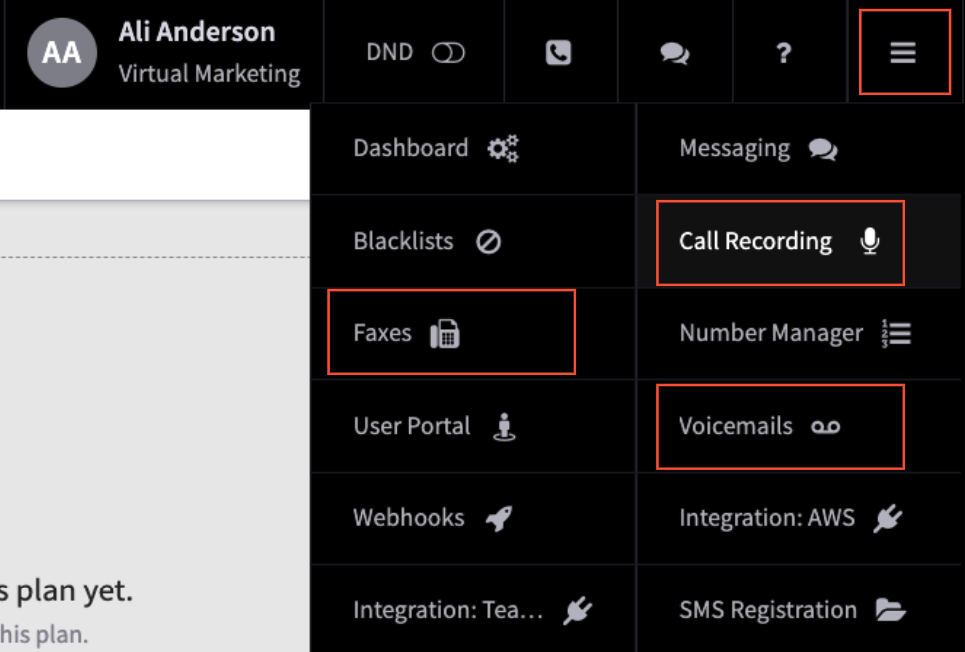
Once you’ve chosen the location, click ‘Choose Storage Option’
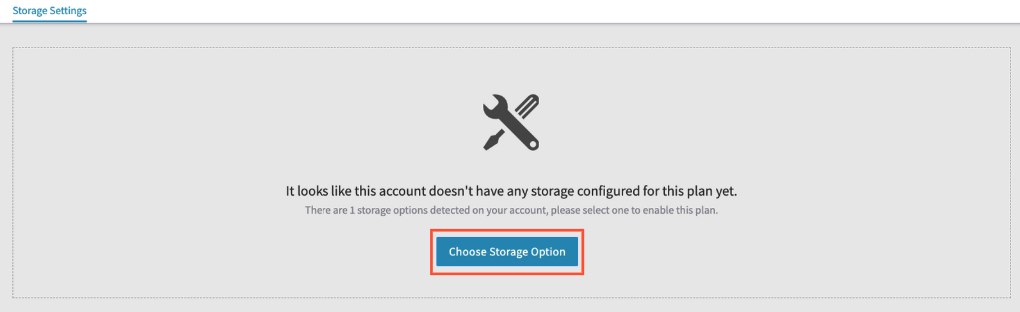
After configuring AWS as your storage option, go to storage settings and make sure the correct folder is attached to each item

Configuring Call Recording Settings
You can configure call recording settings on the backend when setting up your recording line for the full account, and full users.
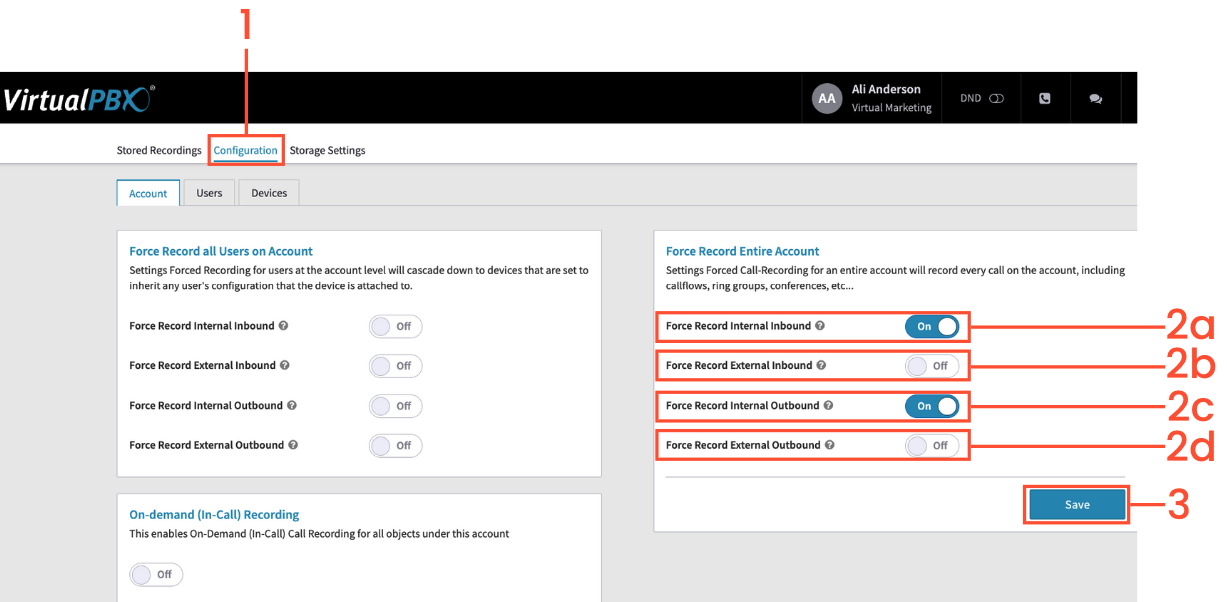
Click on the Configuration Tab
Under Force Record Entire Account choose the options you wish to use to record callsInternal Inbound = Inbound calls from a Dash user to another user etcExternal Inbound = Inbound call from outside the system, ie a customer calls inInternal Outbound = Dash user makes an outbound call to another userExternal Outbound = Dash user makes a call outside the system, ie to a customer
Click on Save
To configure specific users with set call recording choices, navigate to the Users tab on your dashboard.
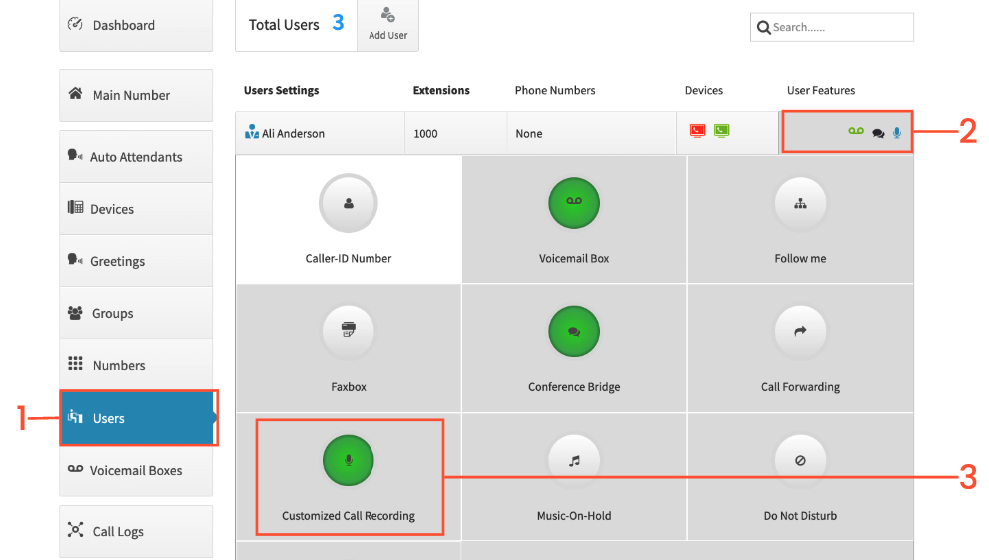
Start by clicking on Users on the left hand side
Choose the User Features tab on the User level
Click on Customized Call Recording
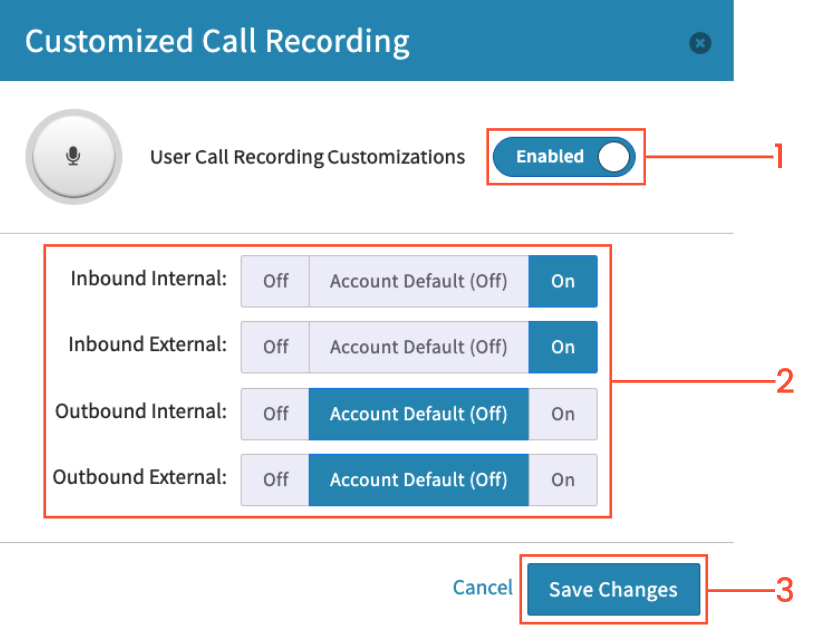
Toggle from Disabled to Enabled
Choose which kinds of calls you want to have recorded. Internal = Within your Dash account, (i.e., User to User calls)External = Calls to/from people outside of your Dash account (i.e., customer calls)
Items to note
VirtualPBX Call Recording’s feature does NOT provide any legal disclaimer (Audible or otherwise) when enabled. Customers wishing to relay such disclaimers should update their system greetings or ringback audio to comply with their local and state regulations or laws.
If your Main Number Incoming Call Handling settings bypass the Virtual Receptionist, please work with our Support Team to ensure that your calls are being recorded appropriately.