

Help Center / Smarter Voice / Call handling / Set up ring groups
Call handling
Set up ring groups in Business Phone
Check the settings available to our phone numbers in our Number Settings Guide!
On this page
Creating a Ring Group
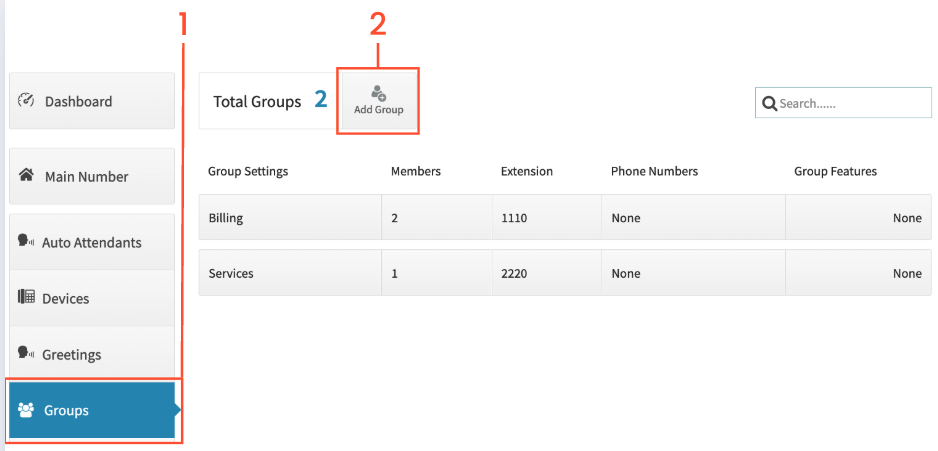
To create a ring group, start by selecting Ring Groups in the Dashboard.
Click the Add Group button.
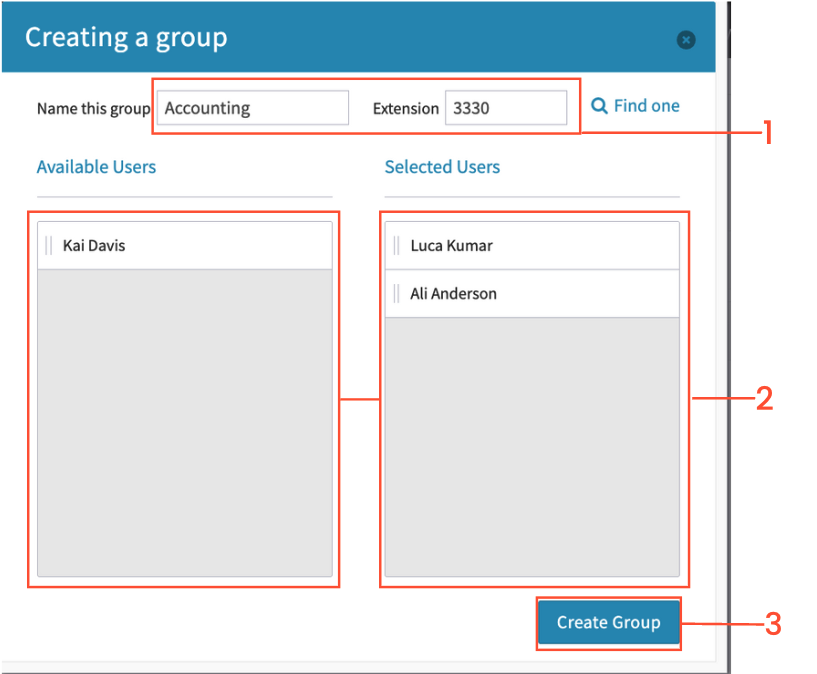
Fill in the Group Name and give the group an extension number. Note: The extension number of a Ring Group cannot match the extension number for other items on your system, such as a user or a voicemail box.
Drag and drop the Users from the “Available Users” column to the “Selected Users” column that you want to be a part of the Ring Group
Click on Create Group when you’re finished.
Ring Group Ring Duration
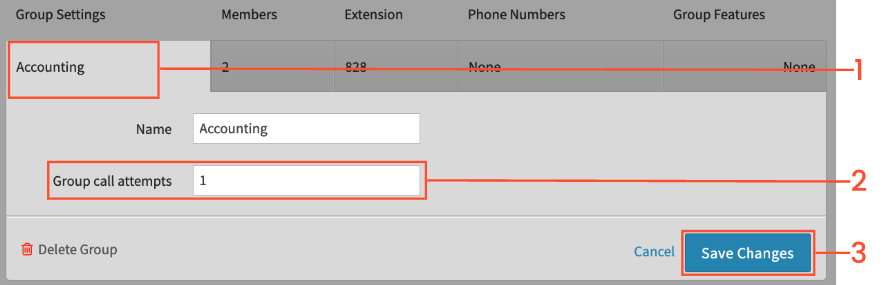
Click on the name of the group you just created.
You will see an option for Group Call Attempts. This is the number of times a caller will ring to the members of the group before the Next Action feature will take effect. You may have the group call attempt up to 9 times.
Click “Save Changes” after you are finished to save the configuration.
Ring Group Distribution Options
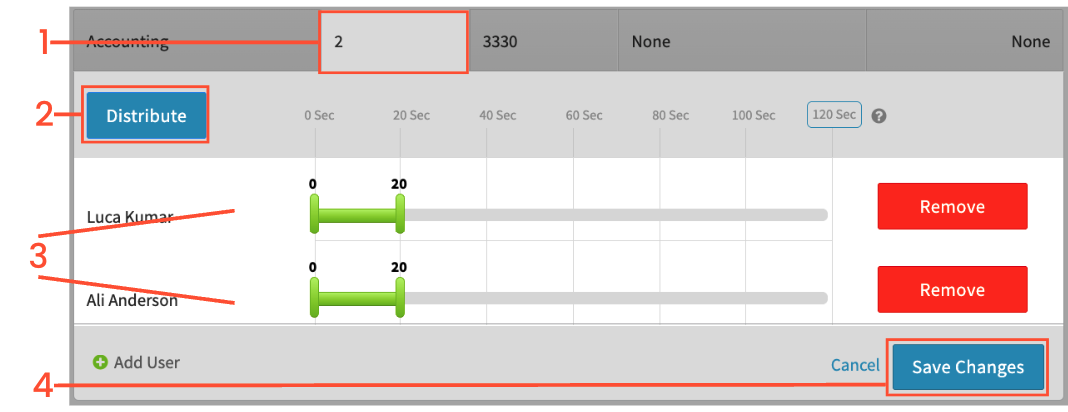
Under Groups, click on the box with the number of members under the “Members” column to open up the ring duration distribution options for your users.
Here you have the option of automatically distributing ring durations; this will automatically adjust the sliders so to distribute ring duration equally, but not simultaneously, across the full 120 seconds.
The sliders are the manual distribution option for the agents - You may adjust these as you like, and can have multiple users with a tiered ring distribution in order to have them ring simultaneously in the group.
Click “Save Changes” once you are happy with the time and order that the calls are supposed to ring your agents.
Dedicated Phone Number
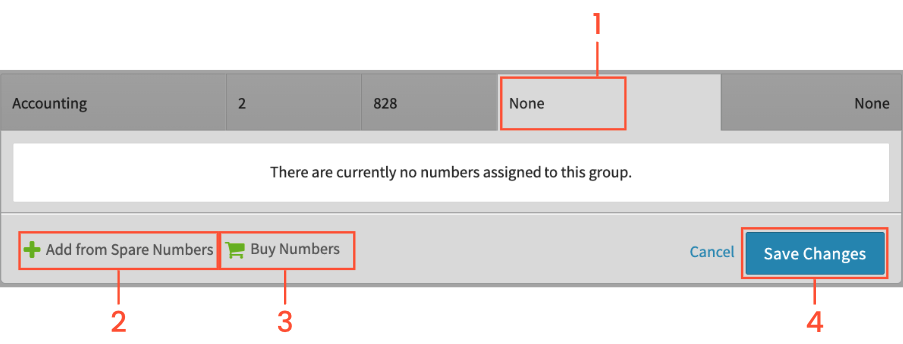
If you would like your group to have a direct phone number, you can add one by clicking on the “Phone Numbers” column under groups.
If you have extra numbers on the system already, you can select “Add from Spare Numbers” to select the number you wish to add.
If you need to buy a number, you can select “Buy Numbers”, choose a local or Toll-free, and add the number to the group. Please note adding numbers may affect your pricing. Contact us if you have any questions!
Click “Save Changes” once you are finished to complete adding the number to the group.
Optional Ring Group Features
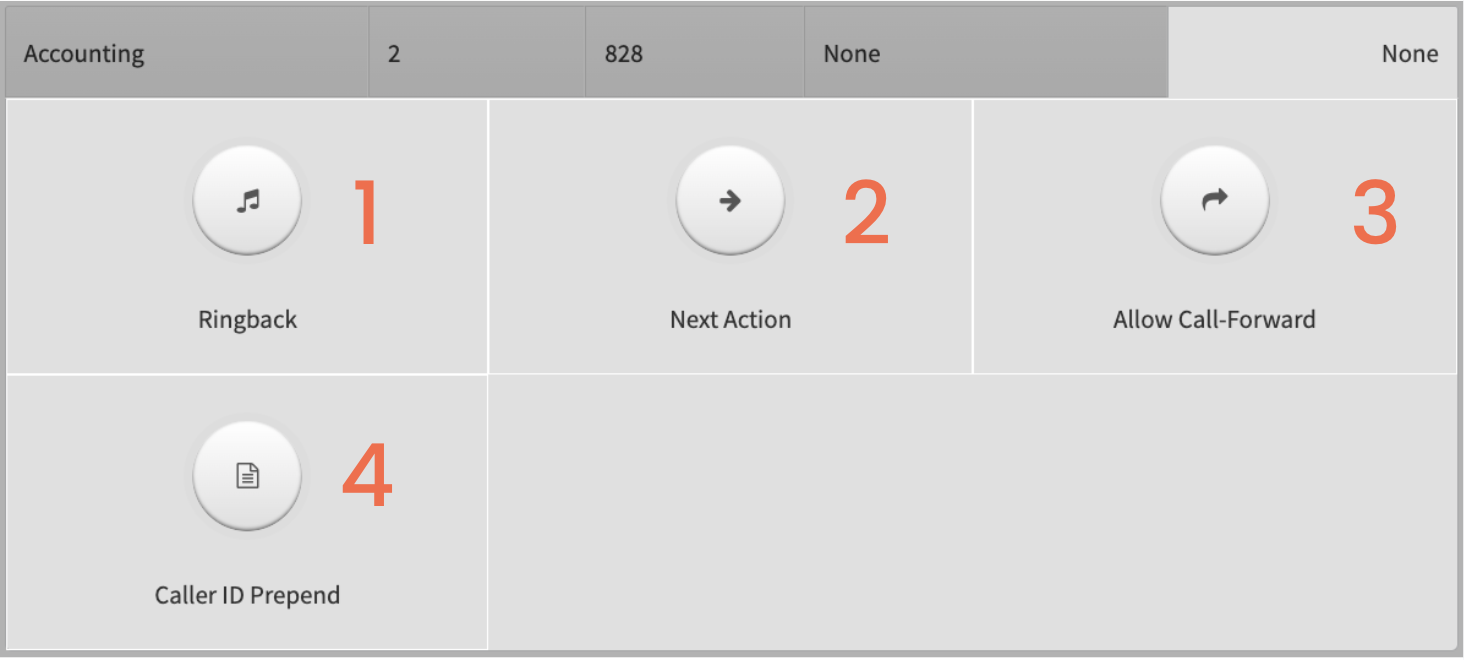
Ringback allows you to have on-hold music or a hold message play while the inbound caller is waiting to connect to a ring group
Next Action allows you to control how Smarter Voice should handle the call if it was not answered; for example, sending the caller to a voicemail box, or another user.
Allow Call-Forward allows the users to press their device “Forward” button to forward a call from this ring group. To enable, click on Allow Call-Forward from the features dropdown and click on the Disabled button to change it to Enabled.
Caller ID prepend changes what your Caller ID will show when receiving calls from this group. This feature only affects the display on VOIP phones.
Ringback
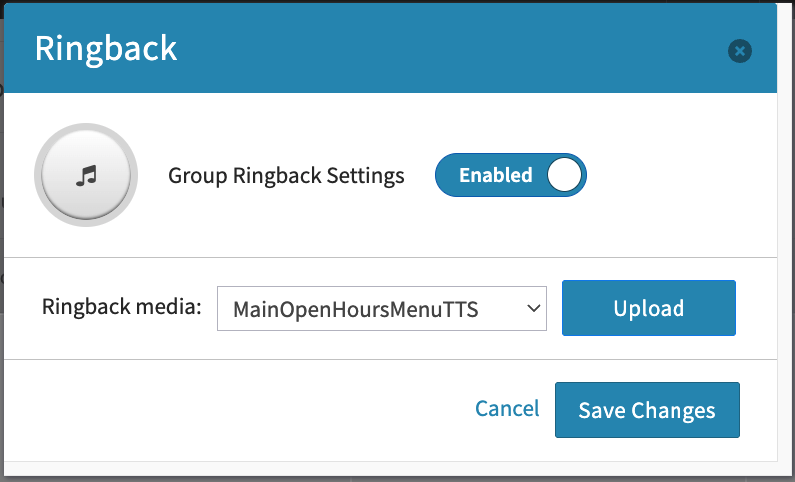
Ringback is a feature that allows you to play media while your customer is ringing to your group. You can use this to play instructions for a customer, a greeting, or even music. Media files will need to in mp3 or Wav. format, and under one megabyte.
Next Action
Next action will dictate what happens to a call if no one in your group picks up. To assure calls are not dropped when agents do not answer, please ensure this feature is on.
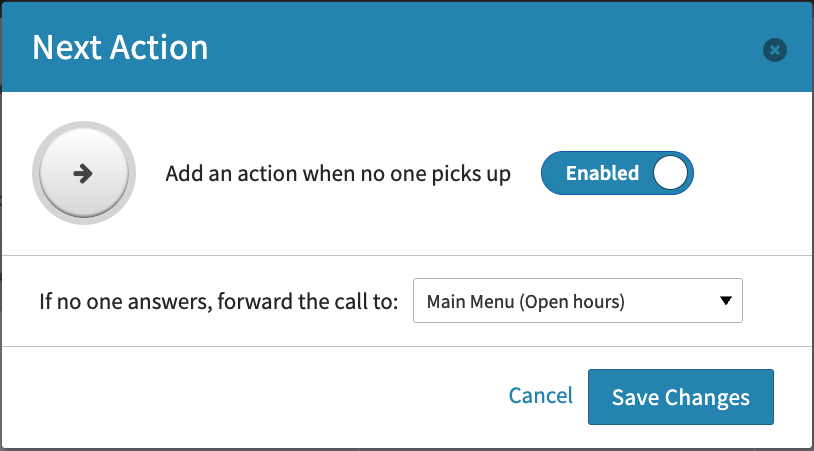
There are multiple places you can route calls to after it goes through call distribution:
Your main menu
A single user
A single device
A ring group
A voicemail box
Allow Call-Forward
Call-Forward allows your group’s users to press the ‘forward’ button on the device to forward a call originating in the ring group.
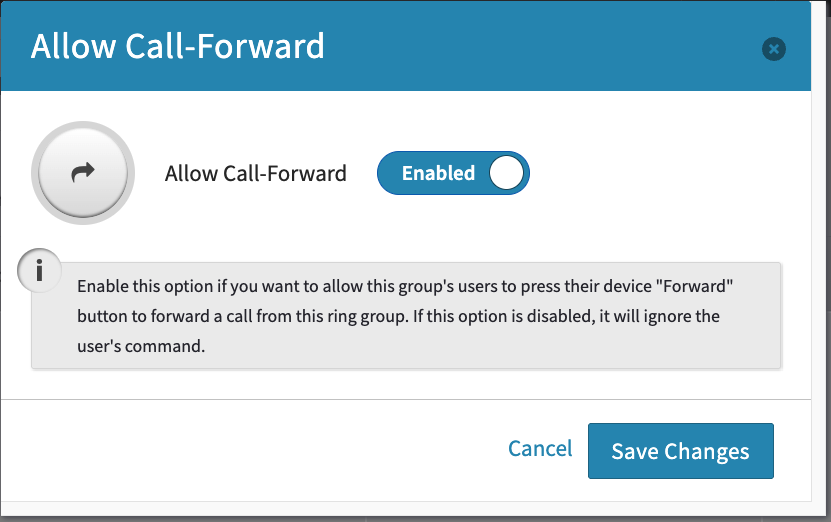
Enable the feature by flipping the toggle to “Enabled”.
Save changes after enabling the feature.
Caller ID Prepend
Prepends allow your agents to see a pre-fixed Caller ID name on their devices when rung. This can be helpful if you have an agent in multiple groups, but would like to know which specific group the customer had dialed to.
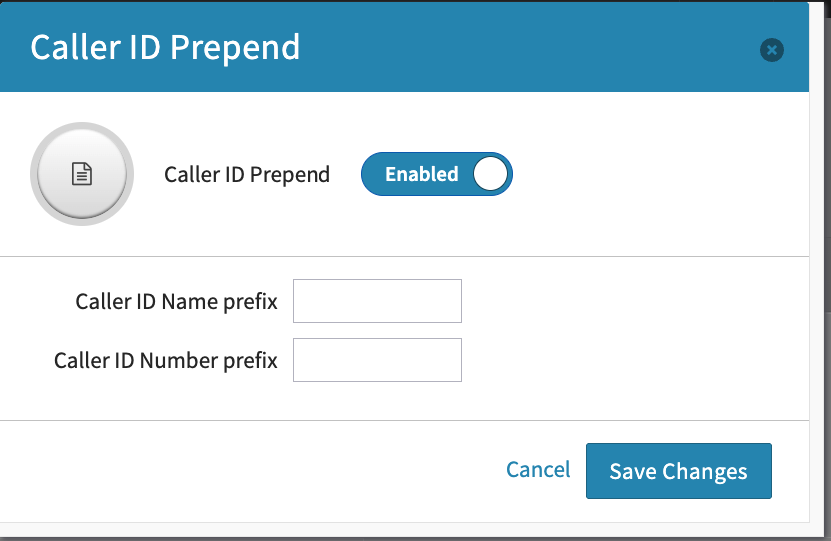
To enable, click on Caller-ID Prepend from the features dropdown and click on the Disabled button to change it to Enabled.
Caller ID Name Prefix will change the Caller ID Name that shows up when receiving a call on a VOIP phone.
Caller ID number Prefix will change the Caller ID Number that shows up when receiving a call on a VOIP phone
Click on Save Changes to save your new configuration.