

Help Center / Smarter Voice / Call handling / Set up audio conferencing
Call handling
Set up audio conferencing in Business Phone
By adding a phone number designated for conferencing, you can create individual conference rooms for each of your users. The conference room can be used by your users, as well as outside clients with you!
On this page
Main Conference Number
Before your users are able to utilize conferencing, you will need to create a main conference number.
Start by clicking on Dashboard > Main Conference Number
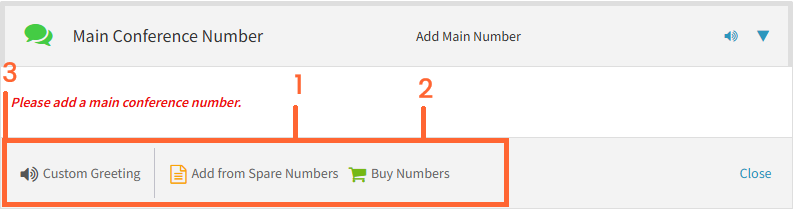
Here you can select a spare number on your account to be setup as the main conferencing number - Alternatively:
Purchase a brand new number to be used for the Conferencing Line - please reach out to our Support Team if you have any pricing questions on adding a new number
Here is where you can set a custom greeting for your Main Conference Number
Setting Up User Conference Rooms
After setting up the Main Conference Number, you will need to set up Conference Bridges for each of your users who will be using the conference line.
Navigate to Dashboard > Users
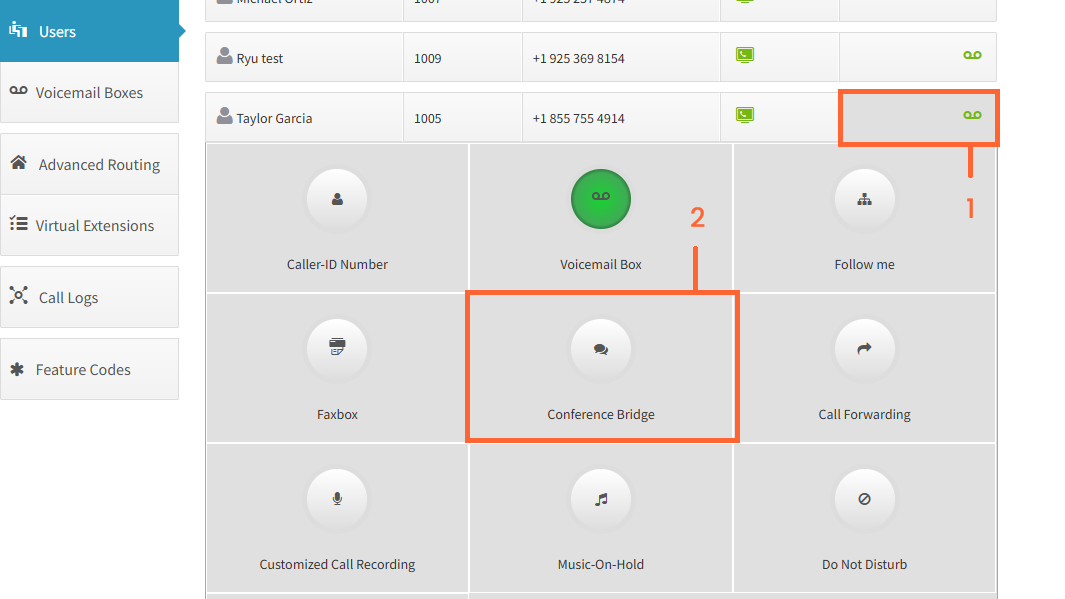
On the user you are trying to setup, click on the user features on the right column
Click on the “Conference Bridge” to configure the feature
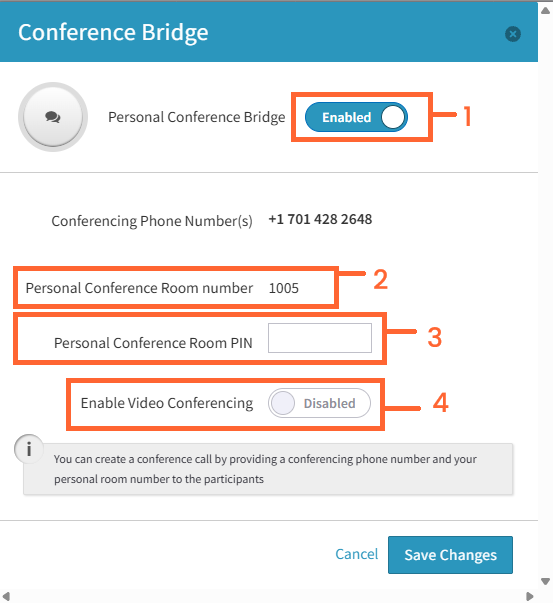
Enable the Feature here to reveal the remainder of the options
This is the personal conference room of the user - customers calling into the main conference line will need to know this room number to enter a conference with your user
A PIN will need to be setup as well, and provided to the customer
You can also enable Video conferences from this interface if needed
How to Conference
Provide your customer the main conference number & the conference room number & PIN.
Customer will dial into the main conference room number, enter the room number, and then the PIN
Customer will be entered into the conference, and will be on hold until another individual joins
Your agent will dial the main conference number, and enter their room number to enter the conference - if they are dialing from a registered device on their user, they should not need to enter a PIN.
Managing a Conference through the User Portal
Log in to the dashboard at dash.virtualpbx.com - if you are an admin you will need to hover over the three-line menu and click on User Portal. If you are a user, you will already be on this page. Click on the Conference tab
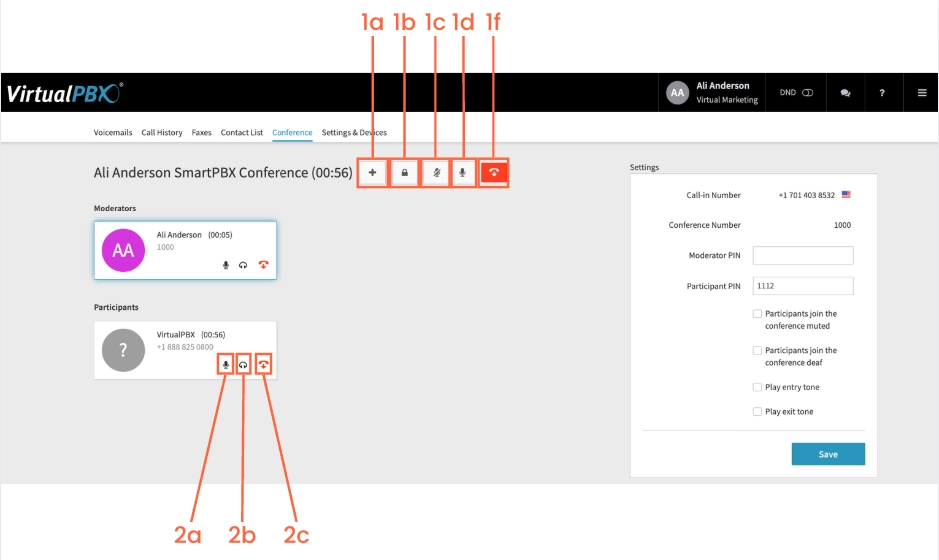
While in a conference you have these optionsInvite other dash users to the conference b. Lock a conference - This will stop any further participants from joining. c. Mute everyone d. Unmute everyone e. End the conference
You also have options for individual participantsMute / unmute a specific personDeafen / turn off the ‘deaf’ feature on a specific personKick a person out of the conference
On the right side of the Conference tab you will see your settings
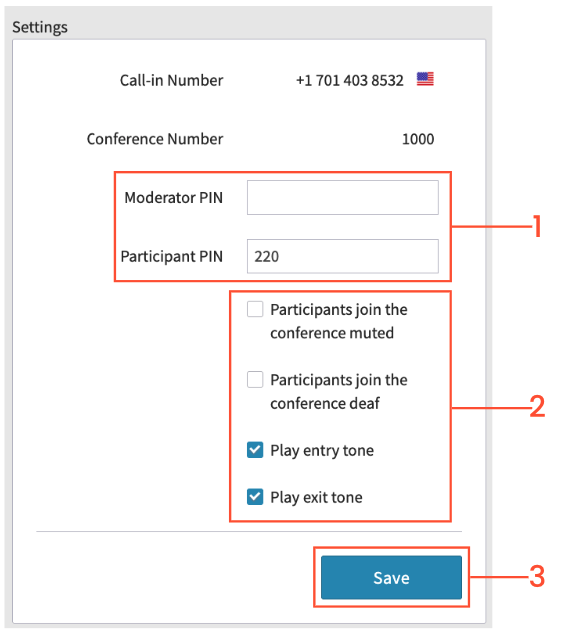
Here you can update both your moderator (yours) and participant PINs - Besides the conference number, this will be required for them to join the conference
You have the option to have participants join muted or deafened as well to play entry and exit tones
Click on Save Changes