

Help Center / Smarter Voice / Users and access / Use the user portal
Users and access
Use the user portal in Business Phone
The User Portal shows voicemails, call history, faxes, contact list, conferences/settings, and your general settings/devices for the user that you’re currently logged in to.
On this page
Non-Admins will be brought to their specific User Portal upon login. Alternatively, you can also click your name on the top right of the Dashboard to navigate to the user portal. Admins must click on User Portal from the upper right hamburger menu to reach the User Portal.
Users do not have access to change their email login from this location - It must be done on the Dashboard by an Admin.
Password allows you to change the password used to log in to the Dashboard.
Non-Admin User:
Use the tabs along the top to navigate to different sections of the User Portal. By default the system starts you on the Voicemail Tab
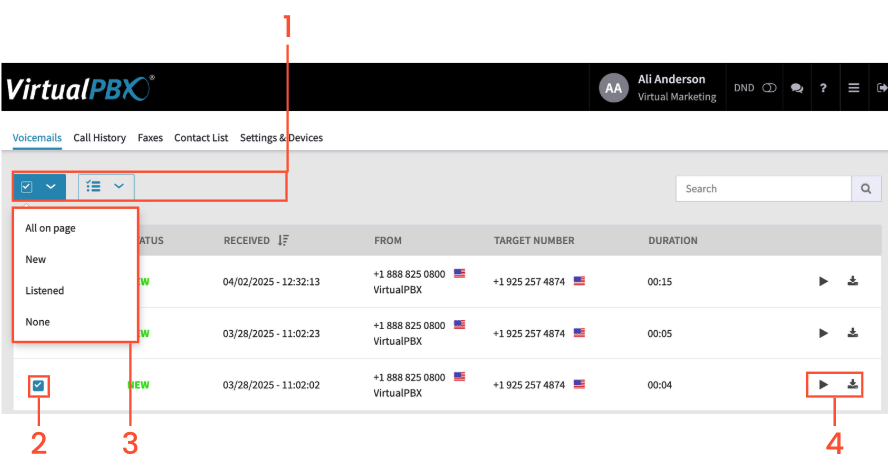
Voicemails
Click on the box in front of a Voicemail to change its status
You can choose to Mark as New, Mark as Listened or Mark As Deleted
To listen or download your voicemails click on the icons at the far right. The triangle is to play the message in your browser/computerThe down arrow icon is to download the voicemail to your device
Keep in mind that you can only store up to 100 voicemails before the voicemail box is full.
Call History
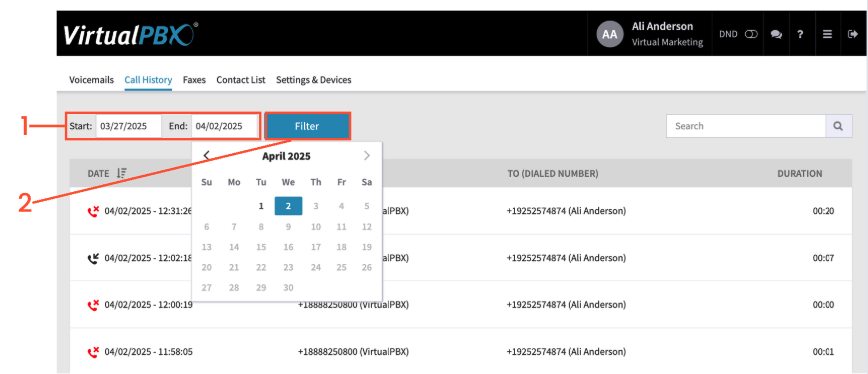
Click on Call History.
Select the start date and end date
Click on Filter
Call History displays your inbound and outbound calls in the date range selected
Faxes
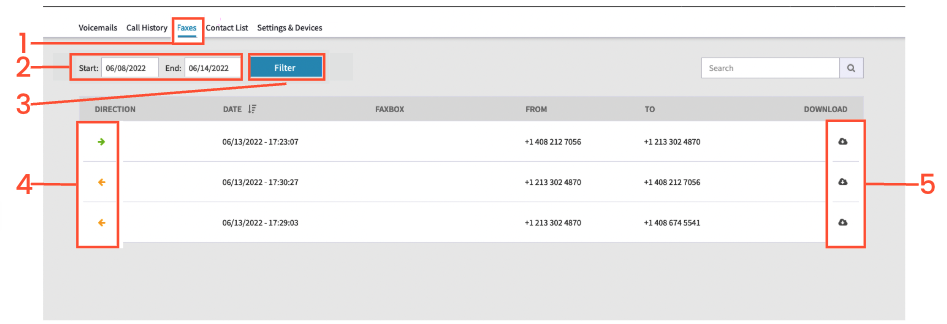
If you have your own fax box, you can click on the Fax tab to see your fax history
Enter the date range you wish to review
Click on Filter to see the results
Green arrow to the right is an inbound fax. Yellow arrow to the left is an outbound fax
You can click on the download icon to download the fax
Contact List
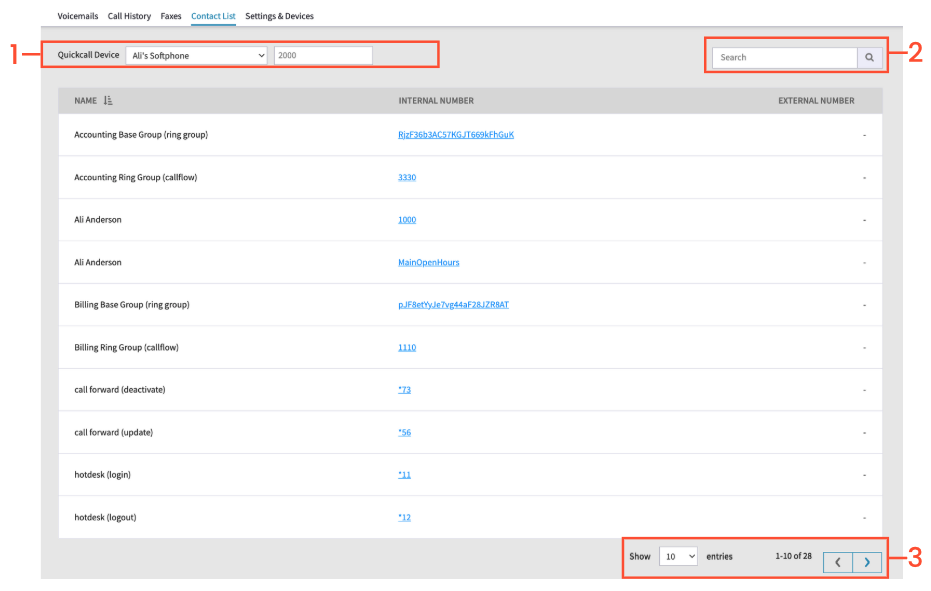
Click on Contact List to view the account’s contact info. This includes users, groups, auto attendants, feature codes, queues, etc.
Quickcall allows Dash to setup a call between one of your devices and another phone number. Choose the extension you would like to call out to or click on the highlighted internal number to call out from your selected device. Once you click ‘call’, your chosen device will ring. From there, answer the call and it will begin calling your intended destination.
Use the search bar to find a specific contact
Change the number of entries per page or click on the arrows to navigate through the list
Conference
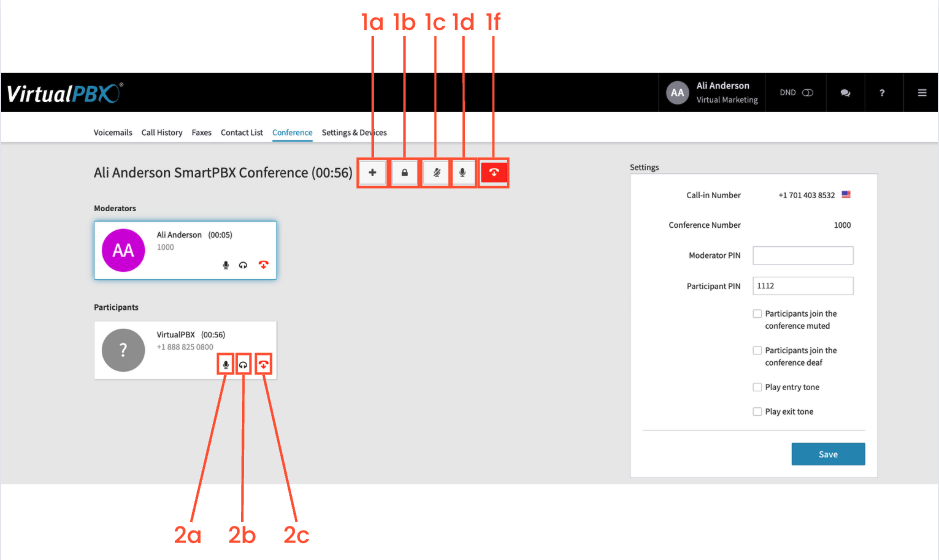
While in a conference you have these optionsInvite other dash users to the conference b. Lock a conference - This will stop any further participants from joining. c. Mute everyone d. Unmute everyone e. End the conference
You also have options for individual participantsMute / unmute a specific personDeafen / turn off the ‘deaf’ feature on a specific personKick a person out of the conference
On the right side of the Conference tab you will see your settings
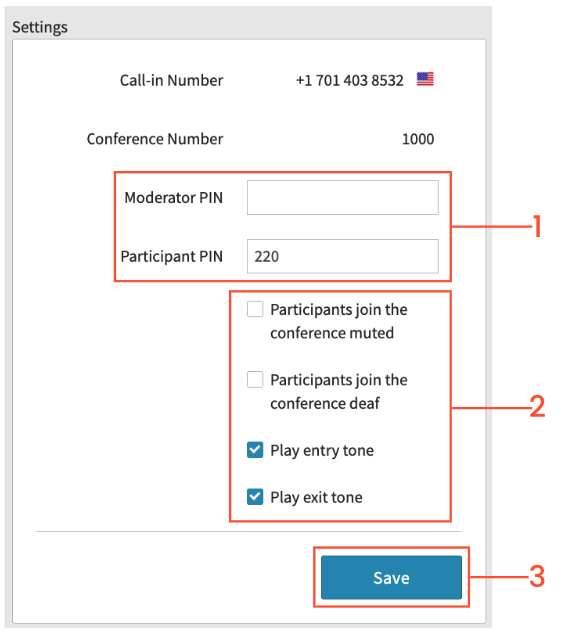
Here you can update both your moderator (yours) and participant PINs - Besides the conference number, this will be required for them to join the conference
You have the option to have participants join muted or deafened as well to play entry and exit tones
Click on Save Changes
Settings and Devices
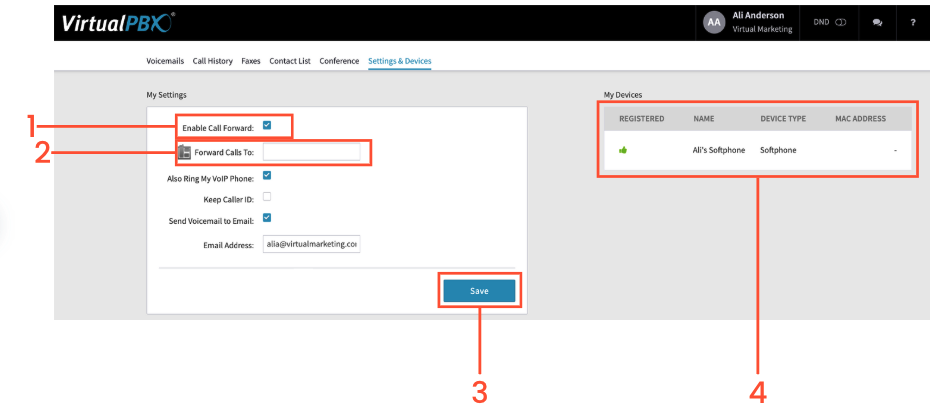
Click on the Settings & Devices Tab
Click to enable Call Forwarding
Click on the Call Forwarding checkbox to set the number where you want to forward your calls. Enter +1 the area code and phone number.
Click on Save
Review your linked devices through the devices section.
Keep Caller ID: will maintain the inbound callers callerID when the call is forwarded. If this is not checked the number the inbound caller dialed, will show up as the caller ID to the receiving device.