Help Center / VirtualText / Automation / Set up AI agents
Automation
Set up VirtualText AI agents
AI Agents can help triage your conversations, engage with customers in tandem with your Playbooks, and more.
On this page

AI Agents
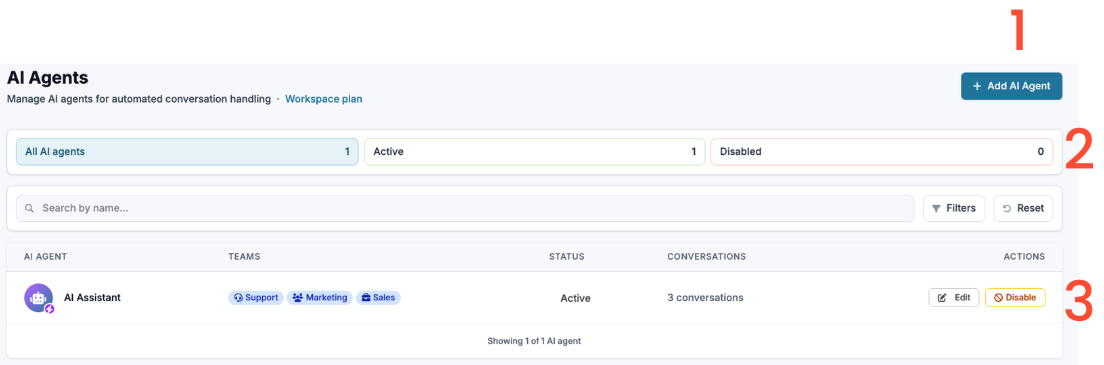
Add an AI Agent
Review your AI Agents’ statistics
Edit your existing AI Agent(s)
Adding an AI Agent
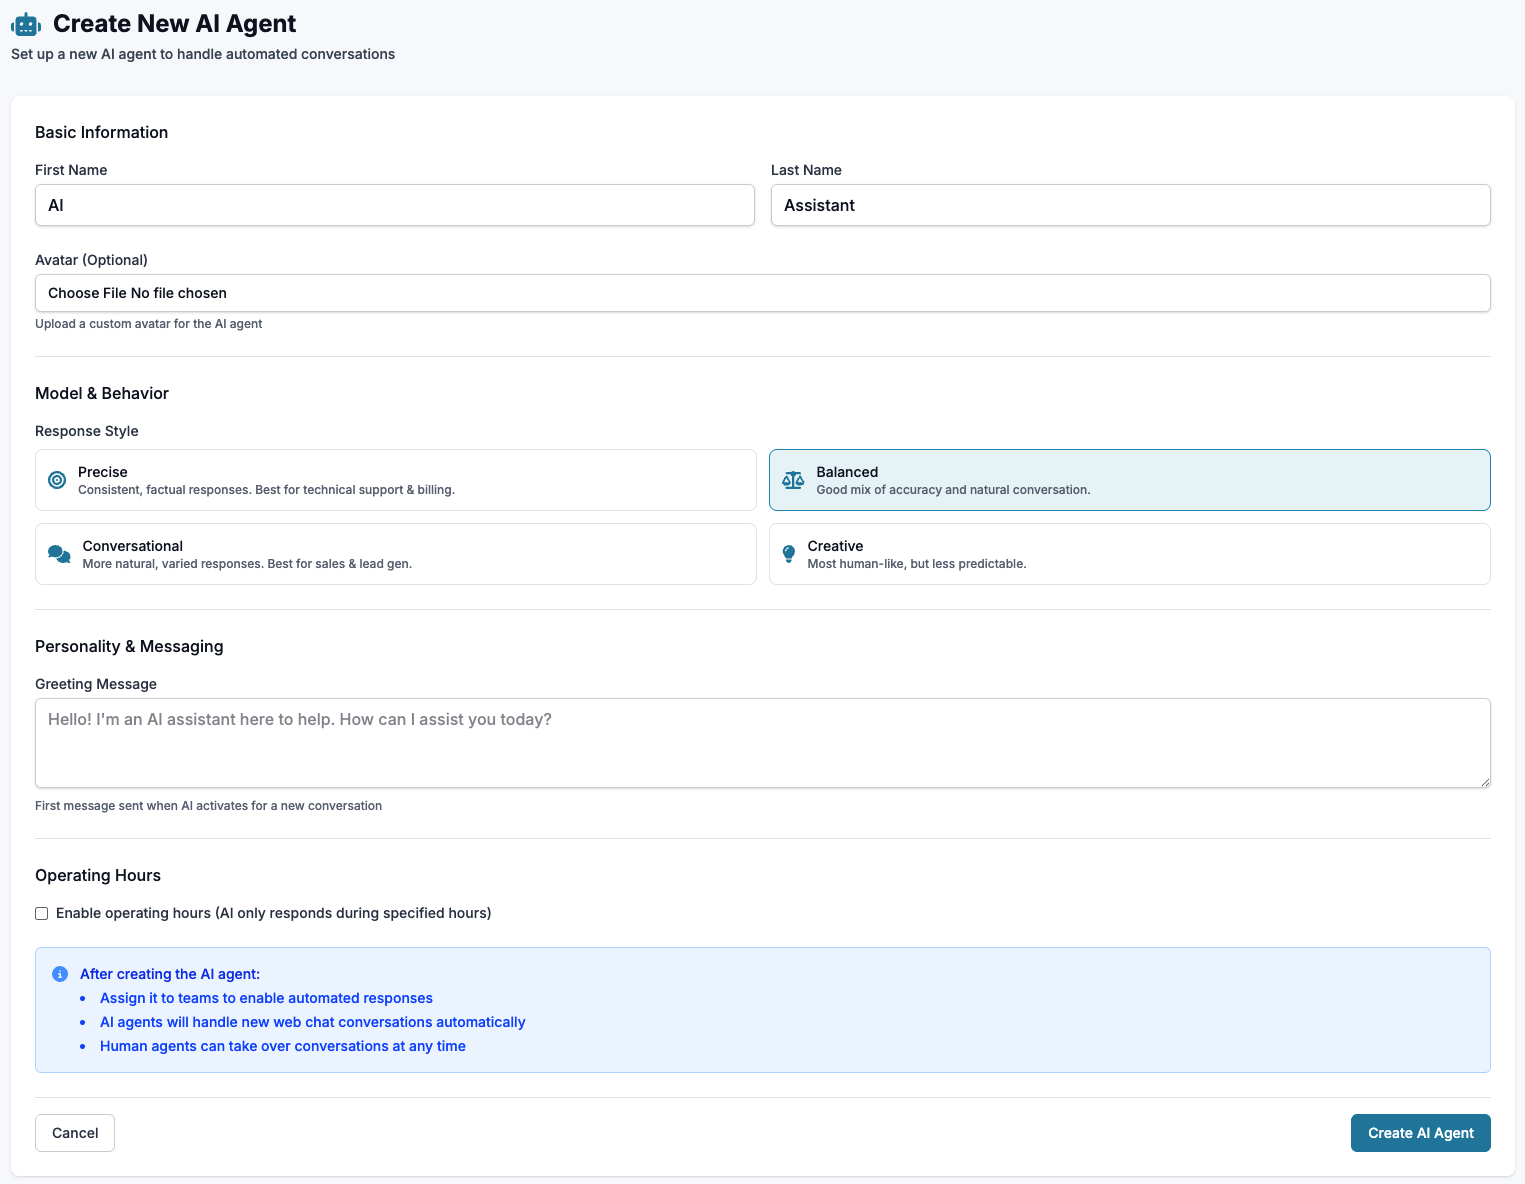
First/Last Name: Choose a name your assistant will go by (AI/Assistant also works)
Avatar (Optional): Custom photo that will show when AI is answering questions
Response Style: Pick your AI’s tone. Choose between Precise (Consistent, factual responses), Balanced (Good mix of accuracy and natural conversation), Conversational (More natural, varied responses) and Creative (Most human-like, but less predictable)
Greeting Message: Initial greeting your AI will start with for new conversations
Operating Hours: If enabled, AI will only answer during these specified hours
After creating the agent, make sure to assign it to your intended teams.
Editing an AI Agent
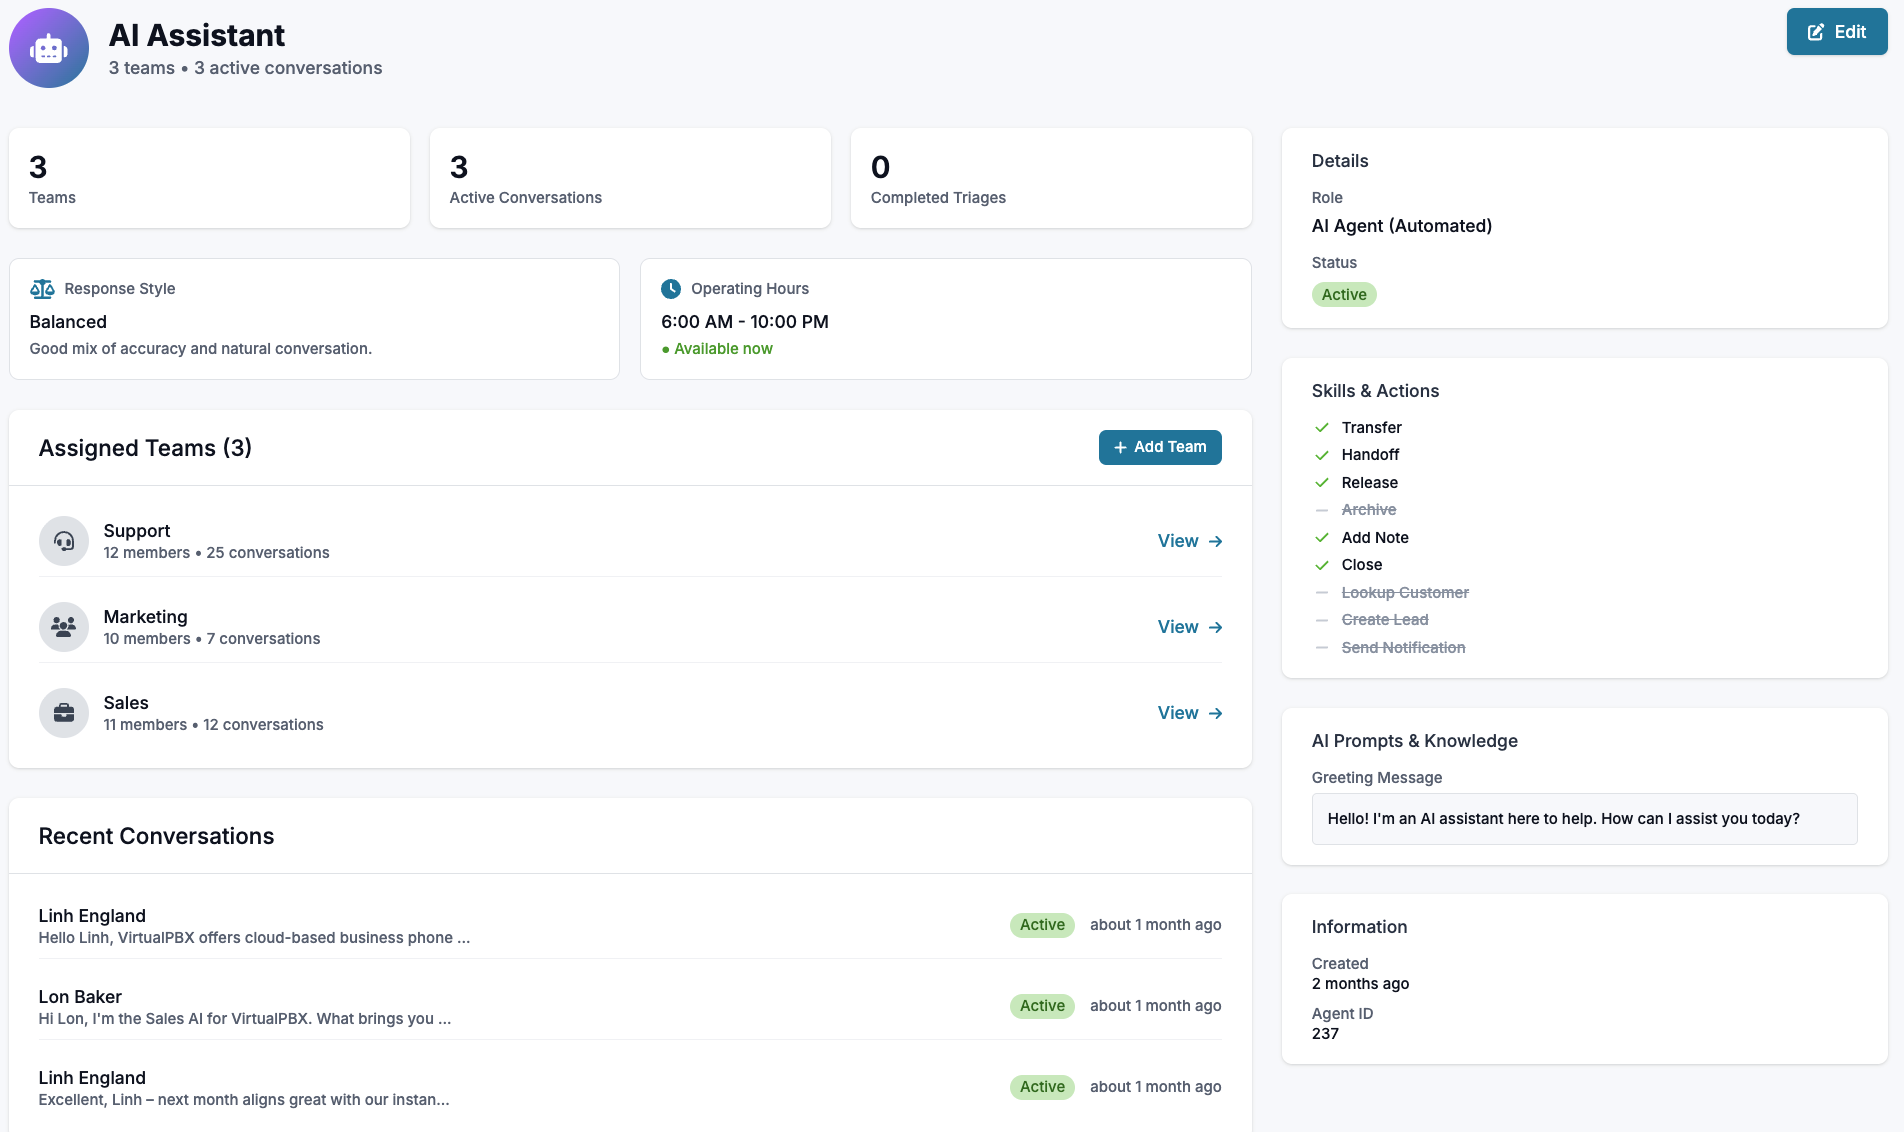
Click on your AI Agent’s name to review the current settings.
Current Settings
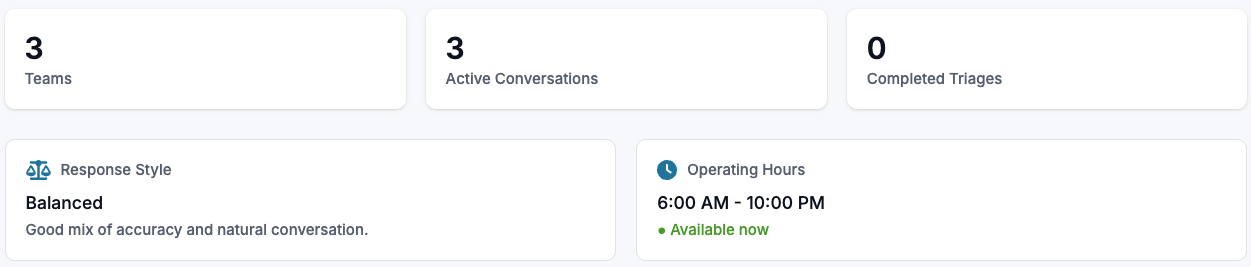
Review the AI’s current teams, conversations, completed triages, and set settings on hours and response style.
Assigned Teams
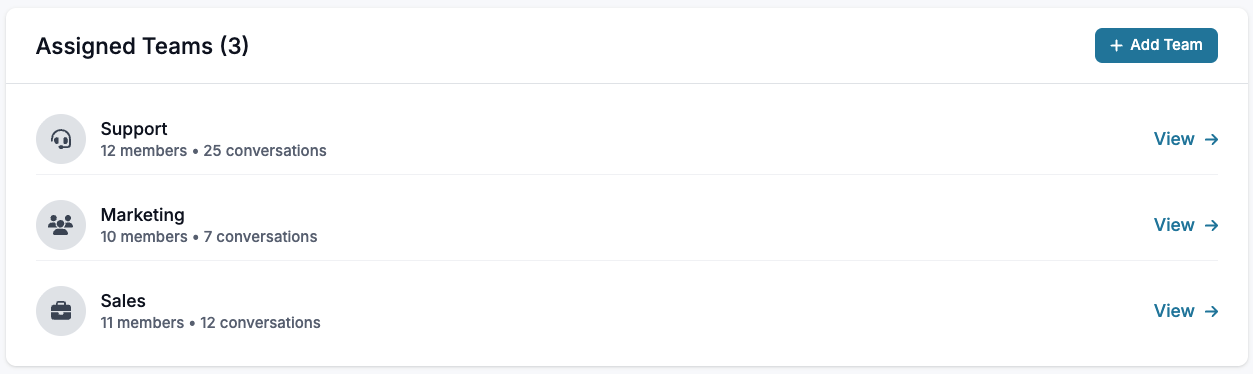
Review and add new teams for your AI to assist. Click ‘View’ to review the full team settings, and ‘Add Team’ to add a new team
Recent Conversations

View a peak of your AI’s recent conversations
Editing your AI
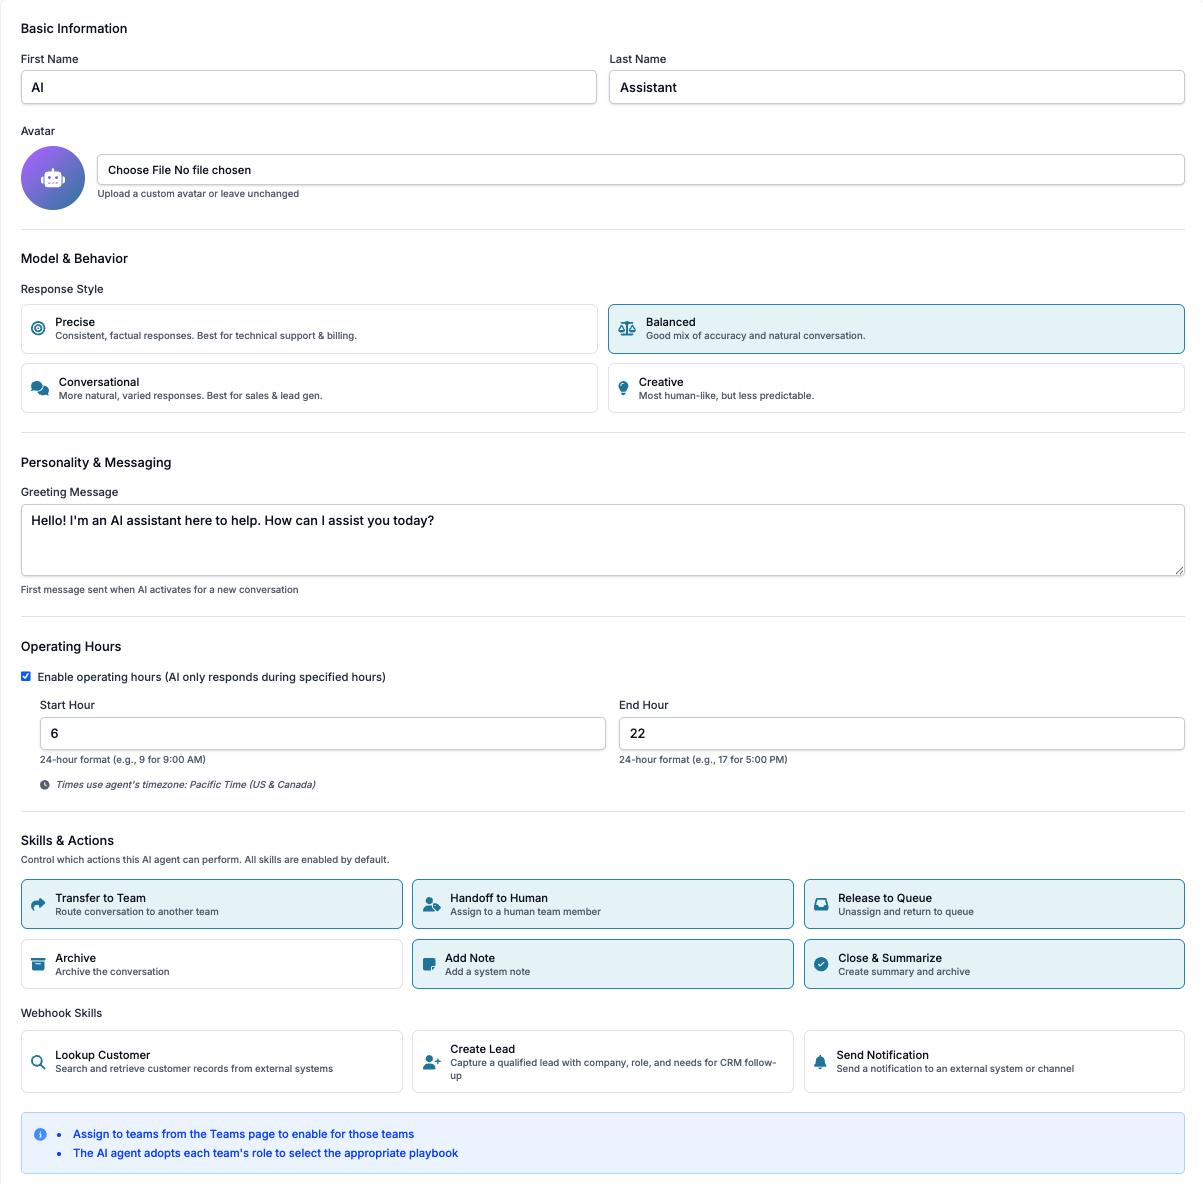
First/Last Name: Choose a name your assistant will go by (AI/Assistant also works)
Avatar (Optional): Custom photo that will show when AI is answering questions
Response Style: Pick your AI’s tone. Choose between Precise (Consistent, factual responses), Balanced (Good mix of accuracy and natural conversation), Conversational (More natural, varied responses) and Creative (Most human-like, but less predictable)
Greeting Message: Initial greeting your AI will start with for new conversations
Operating Hours: If enabled, AI will only answer during these specified hours
Skills & Actions: Skills and abilities your AI is enabled to control and perform. - Transfer to Team: Route conversation to another team - Handoff to Human: Assign to a human team member - Release to Queue: Un-assign and return to queue - Archive: Archive (close) the conversation - Add Note: Add a system note - Close & Summarize: Create summary and archive
Webhook Skills: Skills your AI is able to use if the associated webhooks have been created - Lookup Customer: Search and retrieve customers from external systems (such as your CRM) - Create Lead: Capture qualified leads with information - Send Notification: Send a notification to an external system or channel
AI Playbooks
A Playbook is what your AI Agent refers to when interacting with your consumer base. There are two types of playbooks, both of which your AI Agent refers to:
Team - Team playbooks provide role-specific knowledge to AI agents and team members.
Product - Product playbooks contain product catalog knowledge.
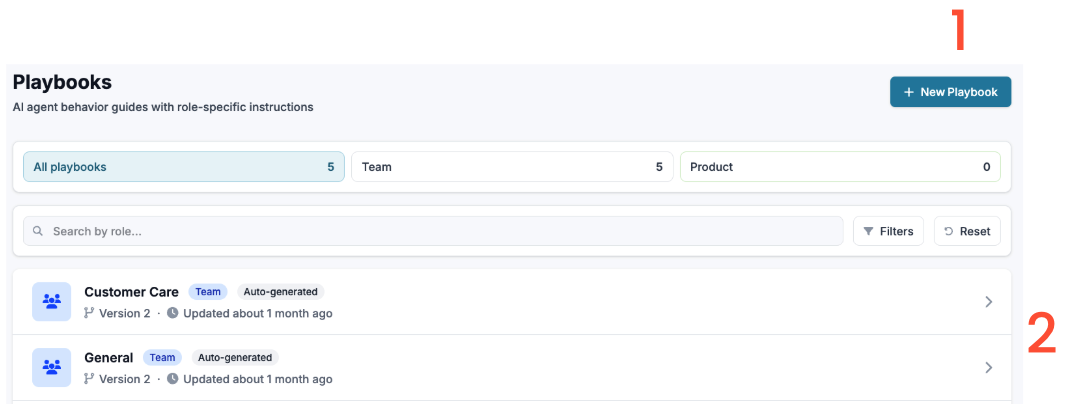
Create a New Playbook
Edit & View existing Playbooks
Adding a New Playbook
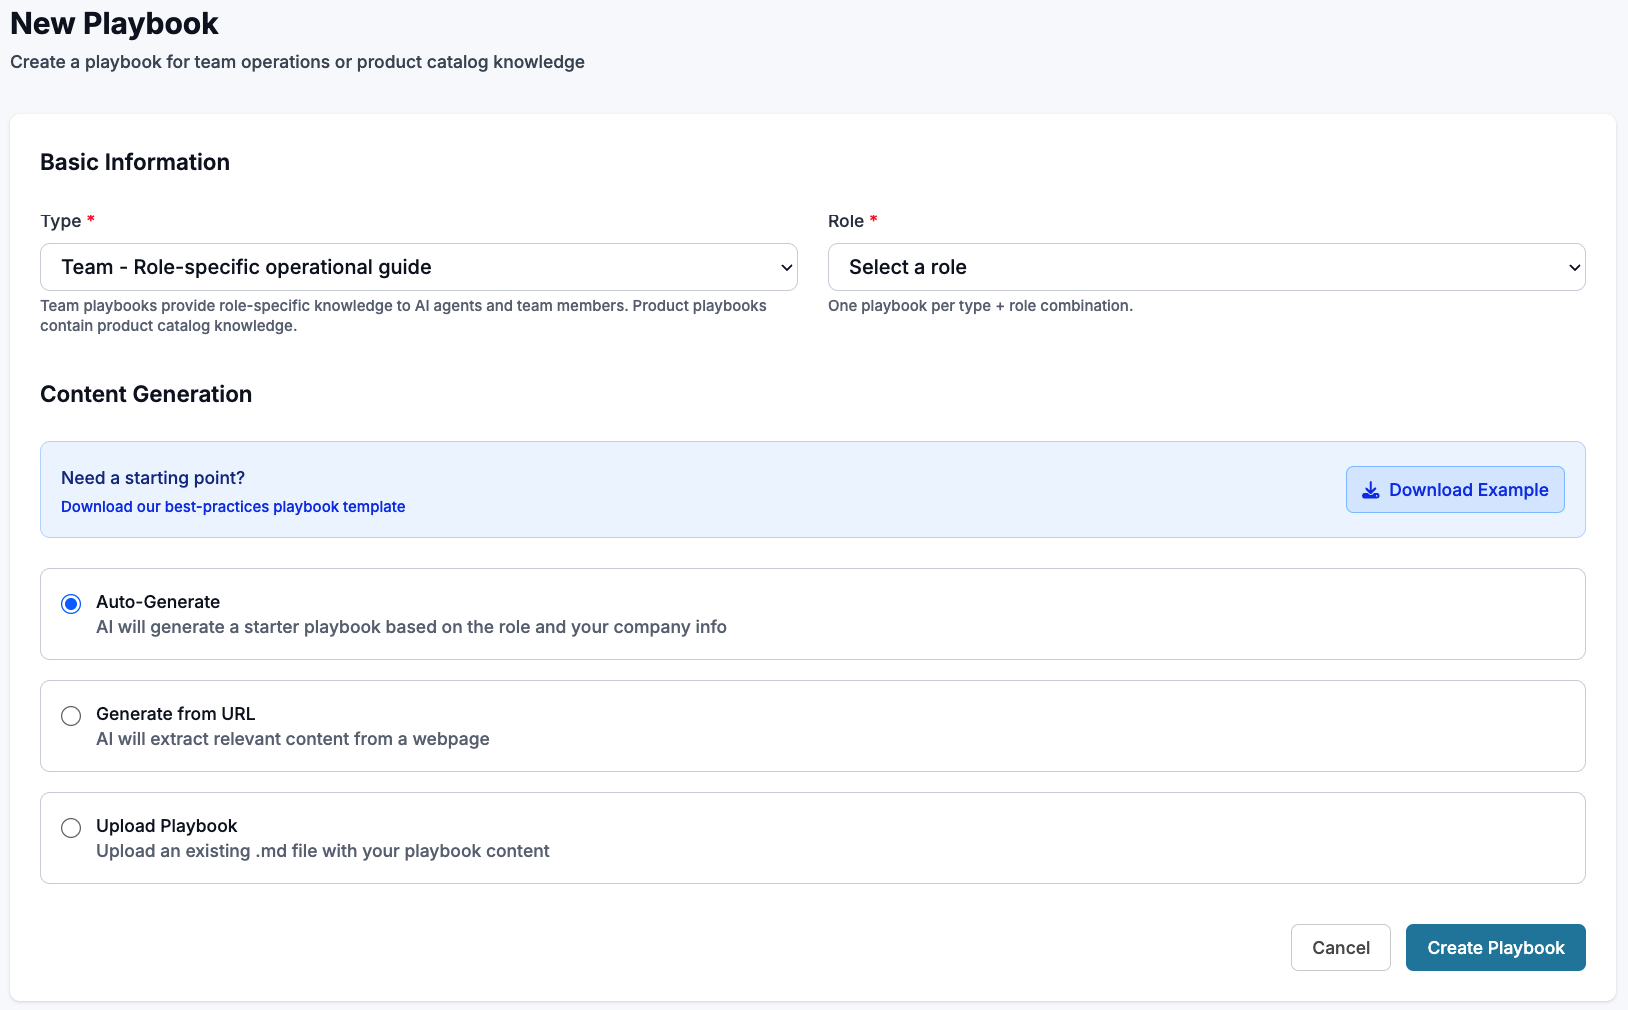
Team Playbook (Role-Specific Operational Guides)
Type: Choose Team
Role: Choose one role for the playbook. Choose between Sales, Customer Care, Technical Support, Billing, Lead Generation, and General
Content Generation: Choose which way your playbook will receive the information used in the playbook. - Auto Generate: Your AI will generate a starter playbook based on the role and company information already in your system - Generate from URL: Extract the information from a webpage (your help page, SOPs posted visibly, etc.) - Upload Playbook: Upload an existing file (must be in .md file format)
Product Playbook (Product Catalog Knowledge)
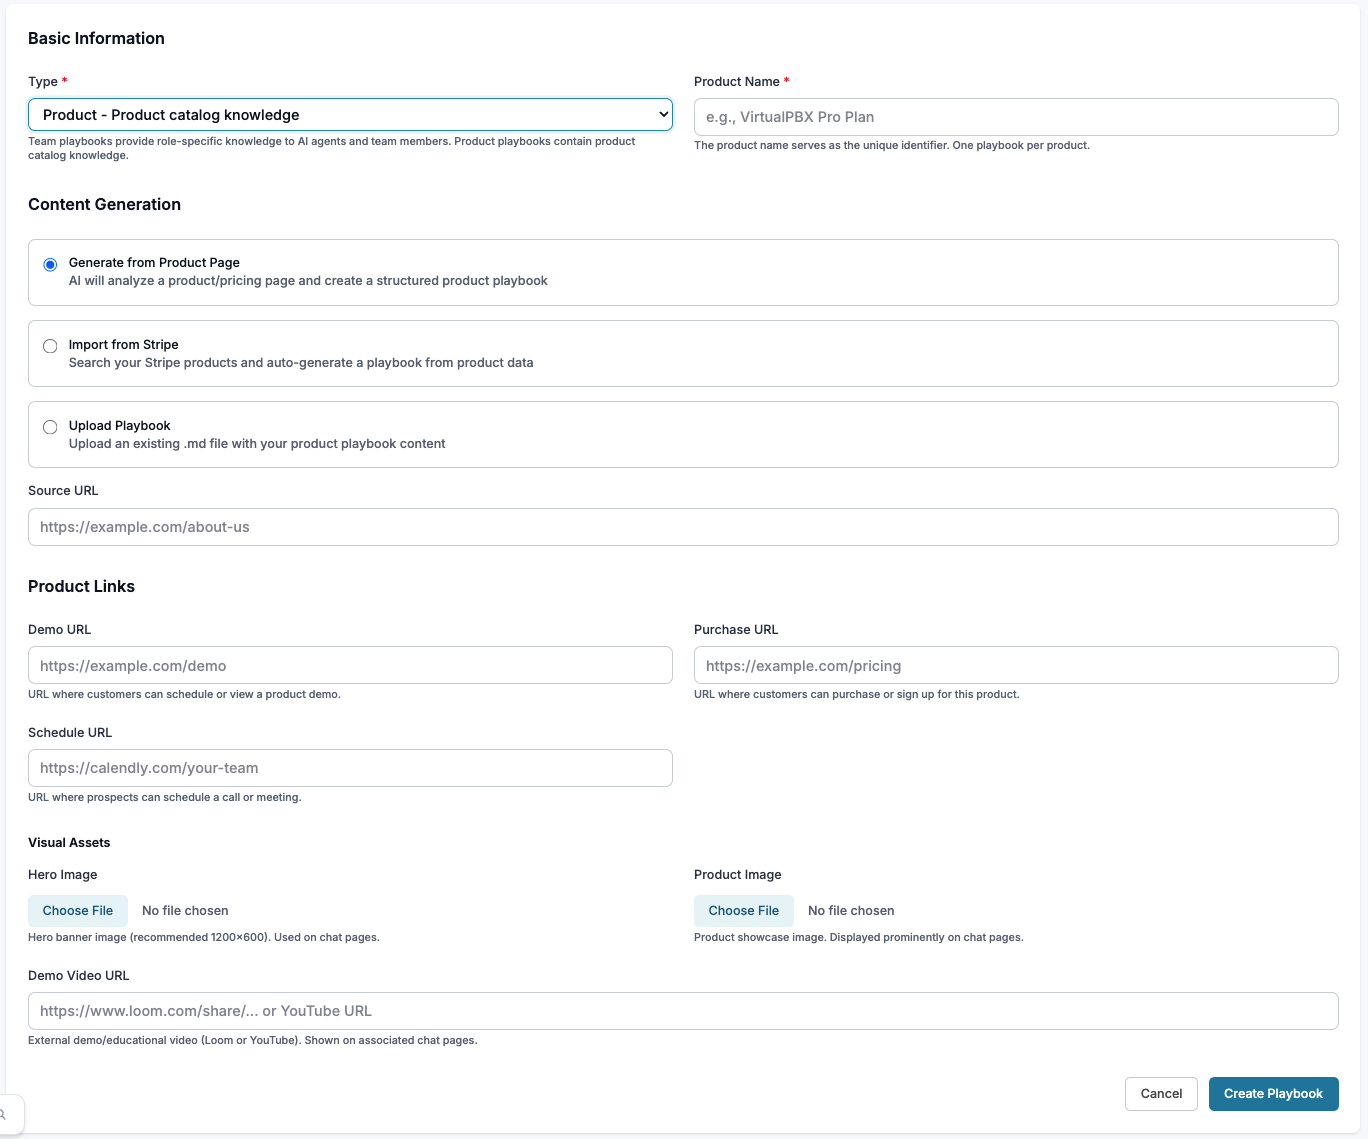
Type: Chose Product
Product Name: Name of your specific product or plan
Content Generation: Choose which way your playbook will receive the information used in the playbook. - Generate from Product Page: AI will analyze your product pages to create the playbook. - Import from Stripe: (You will need to be integrated with Stripe to do so) Search your products through Stripe and generate a playbook through this information - Import a Playbook: Upload an existing file (must be in .md file format)
Product Links: Links for your playbook to reference - Demo: URL where customers can schedule or view a product demo. - Purchase: URL where customers can purchase or sign up for this product. - Schedule: URL where prospects can schedule a call or meeting.
Visual Assets: Images and videos used on your playbook - Hero Image: Banner image (recommended 1200x600). Used on chat pages. - Product Image: Displayed prominently on chat pages. - Demo Video URL: External demo/educational video (Loom or YouTube). Shown on associated chat pages.
Viewing and Revising a Playbook
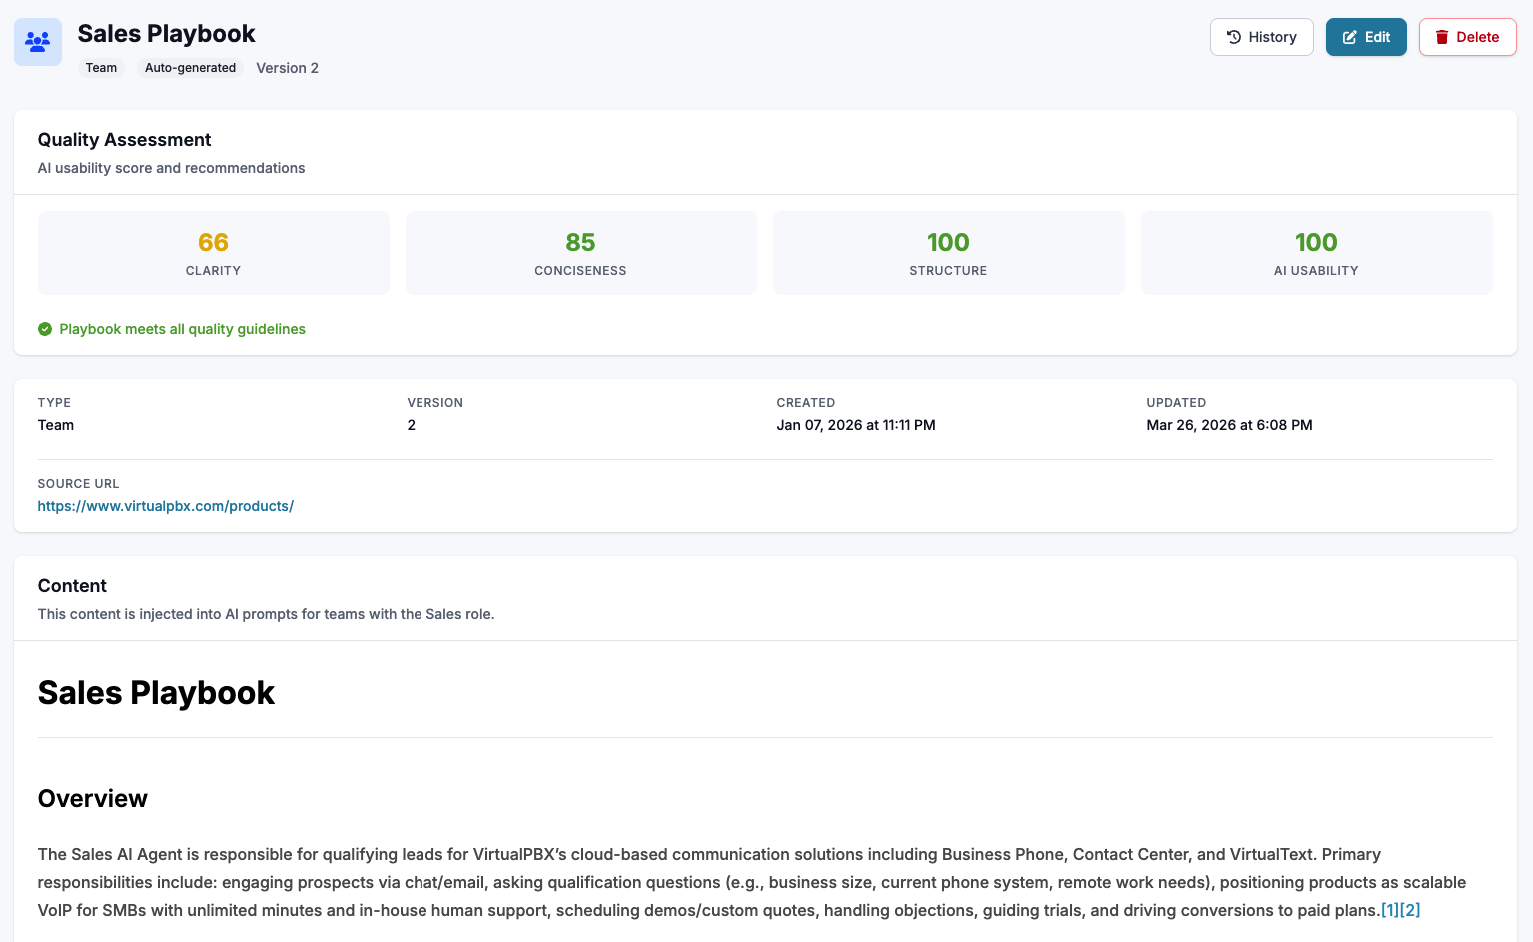
Click into an existing playbook to review the current information. On the top right side click ‘History’ to see previous iterations, or click delete.
Editing a Playbook
Click ‘Edit’ to change items.

Download: Download your current playbook
Upload: Upload a new playbook in .md format
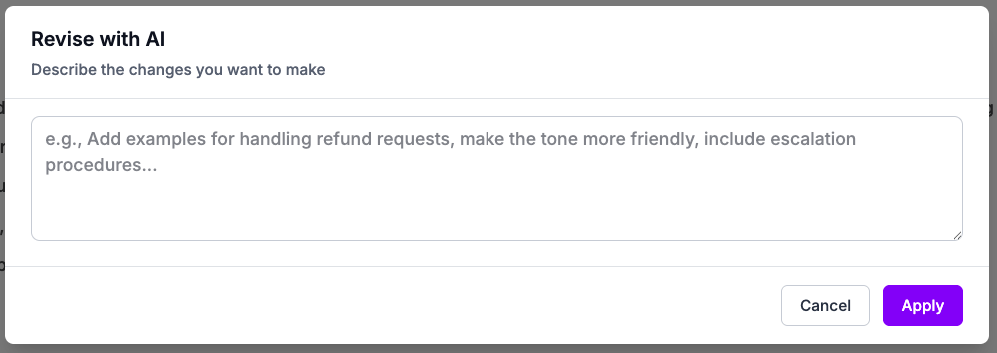
Revise: Update or change information. Add any new changes you need through this text box. Provide FAQ’s, change the tone of the AI, include any procedures missing, etc. The Playbook will show the revisions, and will ask you to accept the revision.