---
notionId: "1bcf0d27c7988010af33c8fa31ed1c8d"
product: "business-phone"
cluster: "messaging"
intent: "business-phone.virtualtext-forward"
docSlug: "virtualtext-forward"
task: "Forward texts from Business Phone"
title: "Forward texts from Business Phone | VirtualPBX"
meta_description: "If this option is not available within your dashboard, you may be on a plan that does not include Add-Ons. Please reach out to our Customer Service Team to"
answer: "If this option is not available within your dashboard, you may be on a plan that does not include Add-Ons. Please reach out to our Customer Service Team to discuss upgrading your plan and turning this feature on by emailing experience@virtualpbx.com or calling +1 (888) 825 0800"
audience: "admin"
updated: "2025-03-20"
legacy: ["virtualtext-forward"]
headings: [{"depth":2,"text":"VirtualText Forward","id":"virtualtext-forward"}]
lint: ["meta-answer","answer-first"]
---
## VirtualText Forward
Once the feature is turned on, hover over the black bar on the three line menu to choose ‘Messaging’
The Messaging page is where you’ll be able to view VirtualText, Text Numbers, and VirtualText Forward.
1. Choose VirtualText Forward
Add Number
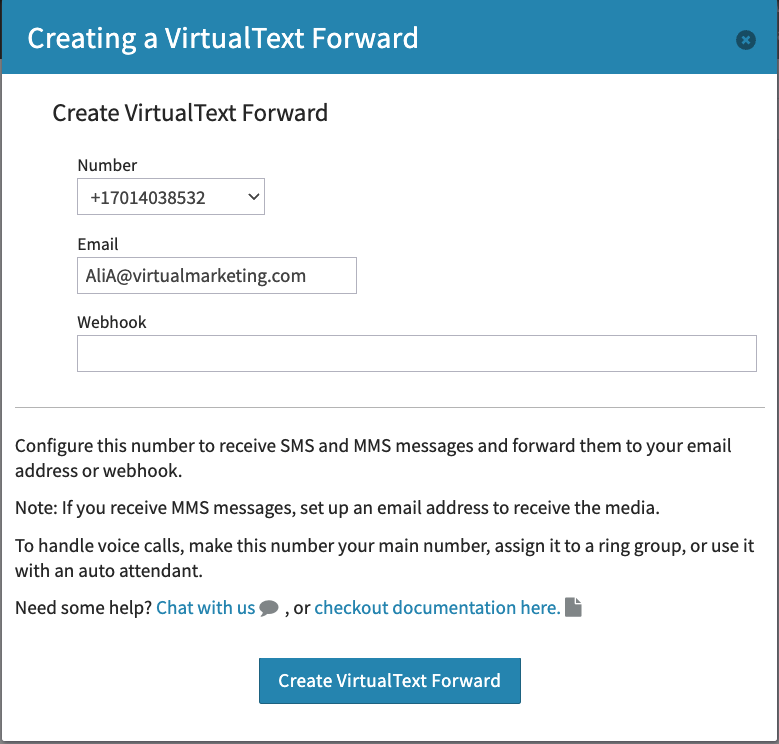
Choose which number you would like to receive forwarded texts from. All numbers beside VirtualText numbers will be available.
Enter the email address that should receive those messages or paste in the webhook url. Once this is completed, just click on Create Text Forward.
Next, test your message delivery by clicking send a test message. Your message will display what number is the message sent from, what number is sent to, and the message content.
Please note MMS is sent as an attachment on emails and is not available in your webhook’s payload.
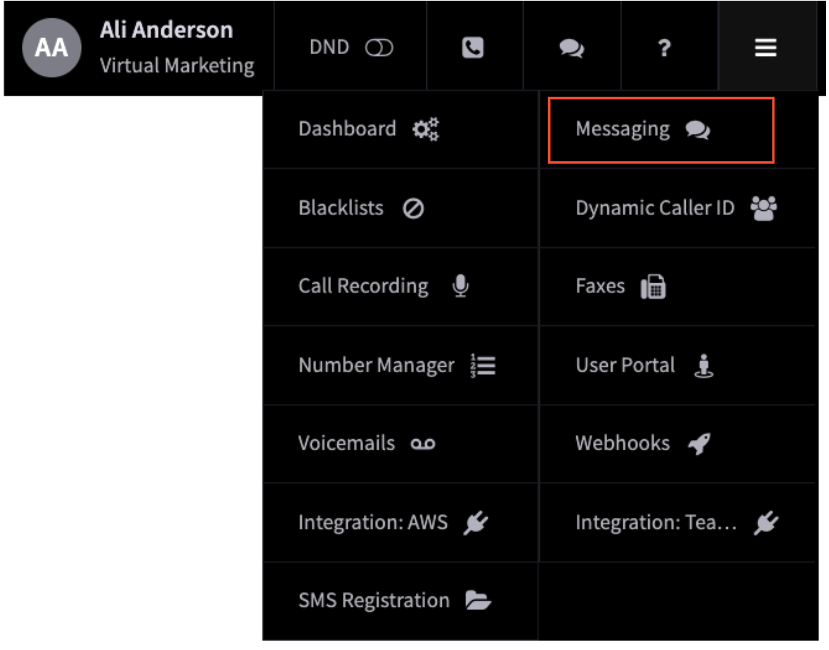 The Messaging page is where you’ll be able to view VirtualText, Text Numbers, and VirtualText Forward.
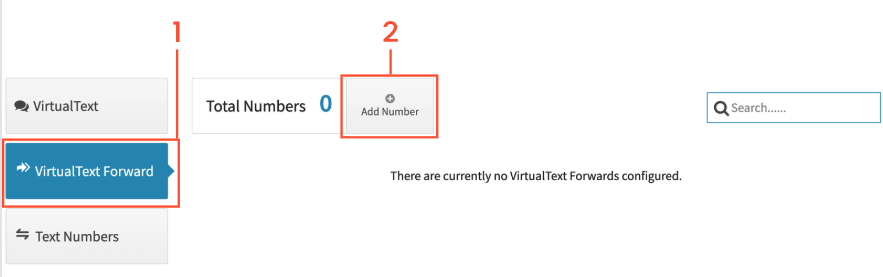 1. Choose VirtualText Forward