---
notionId: "1bcf0d27c79880128647c0fcf6c5480d"
product: "business-phone"
cluster: "call-handling"
intent: "business-phone.caller-id"
docSlug: "caller-id"
task: "Choose caller ID in Business Phone"
title: "Choose caller ID in Business Phone | VirtualPBX"
meta_description: "To set up your Dynamic Caller ID settings, start by clicking on the Dynamic Caller ID option in the hamburger menu (3 horizontal bars) on your main VirtualPBX"
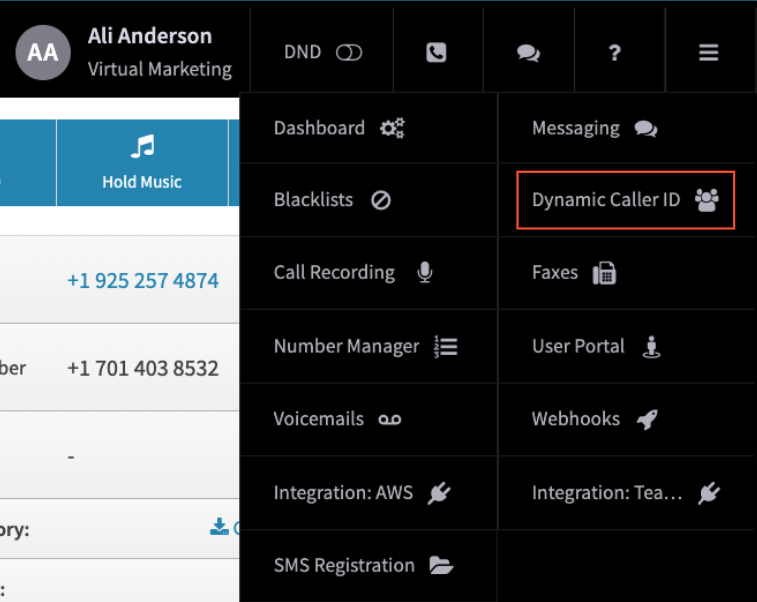
answer: "To set up your Dynamic Caller ID settings, start by clicking on the Dynamic Caller ID option in the hamburger menu (3 horizontal bars) on your main VirtualPBX Dashboard screen."
audience: "admin"
updated: "2025-03-20"
legacy: ["advanced-caller-id","caller-id-options"]
headings: [{"depth":3,"text":"Dynamic Caller ID","id":"dynamic-caller-id"},{"depth":3,"text":"Verified CallerID Numbers","id":"verified-callerid-numbers"},{"depth":2,"text":"Direct Inward System Access (DISA)","id":"direct-inward-system-access-disa"},{"depth":3,"text":"Using DISA","id":"using-disa"}]
lint: ["meta-answer","answer-first"]
---
### Dynamic Caller ID
Dynamic Caller ID has two uses:
Link Feature Codes to each of your Phone numbers so you can manually determine which Caller ID you’d like to use on outbound calls
Link Area Codes to each of your phone numbers, so that outbound calls to that area code will show the Caller ID you’d like
On the next screen, click the Create New Rule button:
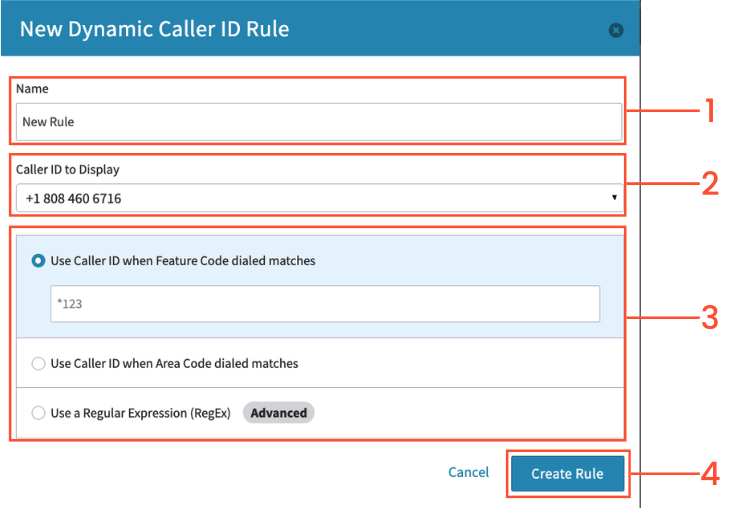
Name: Create a unique name for the rule
Caller ID to Display: From the dropdown menu select the phone number that you want to be displayed as the outbound callerID. You will be able to add from numbers you own including spare numbers, or purchasing a new number specifically for this use.
Choose to use either a Feature code to enable the callerID or an Area codeUse Caller ID when feature code dialed matches: Enter a feature code not already used on the systemWhen making a call outbound from a VOIP device on the system, enter this feature code and the area code and phone number you wish to reach. The caller ID will display what was set for that particular feature code. Use CallerID when area code matches: Select the Caller ID you want to have show up from the drop-down menu. This selected Caller ID will show when you dial a phone number with the area code you have selected. Select Use CallerID when are code matchesEnter the area code you’re interested in. An example: If you select 775 600-1457 for the Caller ID and set the area code to 702, when you make an outbound call to area code 702, the 775 600-1457 phone number will be displayed as your Caller ID.
c. Use Regular Expression (RegEx):
### Verified CallerID Numbers
You can add an external number to be used for Outbound Caller ID for a user. It cannot be used as a main number, nor as the default Caller ID for the account.
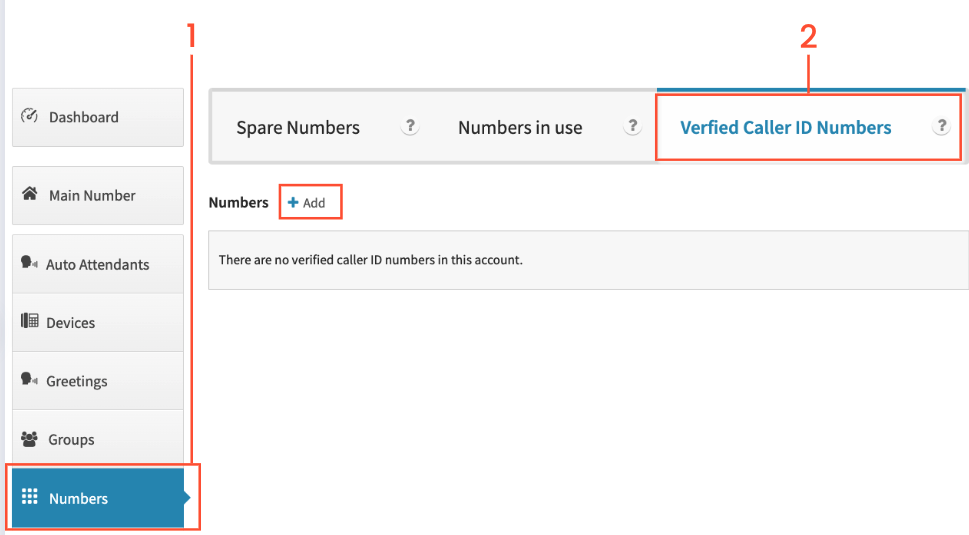
On the left side of your dashboard, click on the Numbers tab
Click on Verified CallerID Numbers
Click on add - a pop-up box will now appear
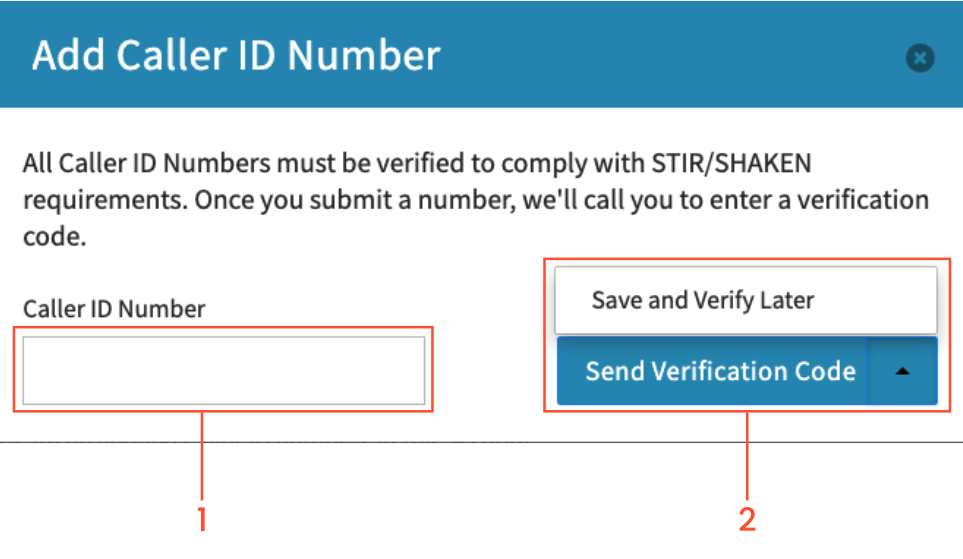
Enter the area code and phone number
Click on Send Verification code - You can also save the number and verify later, however, the verification will need to be completed to utilize the number.
The system will now call you at the entered number and read off the full phone number and a 4-digit verification code that you will need to enter into the dashboard.
Please note that when the system calls the number a person does need to be able to pick up the call. In other words you do not want an auto-attendant/greeting to be the first thing that picks up the verification call.
After that you are able to select that number as a valid outbound callerID on users with the Caller ID feature enabled (note- this feature requires that the user have a phone number assigned to the user which would be in addition to the verified number).
## Direct Inward System Access (DISA)
Direct Inward System Access allows cell phone and landline telephone users to call into your account and then initiate an outbound call using your system’s Default Caller ID.
This feature of the system generally needs to be approved by VirtualPBX, as it can open you up to security risks and unexpected usage on your account if used maliciously.
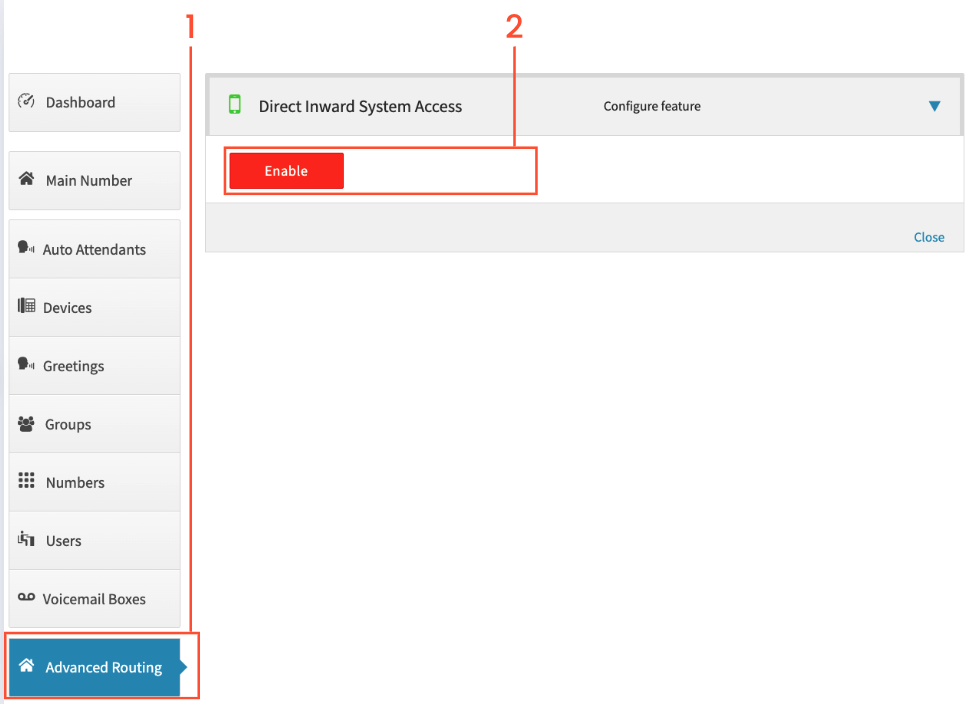
Start by clicking on Advanced Routing on the left side
Click on Direct Inward System Access
Click to Enable
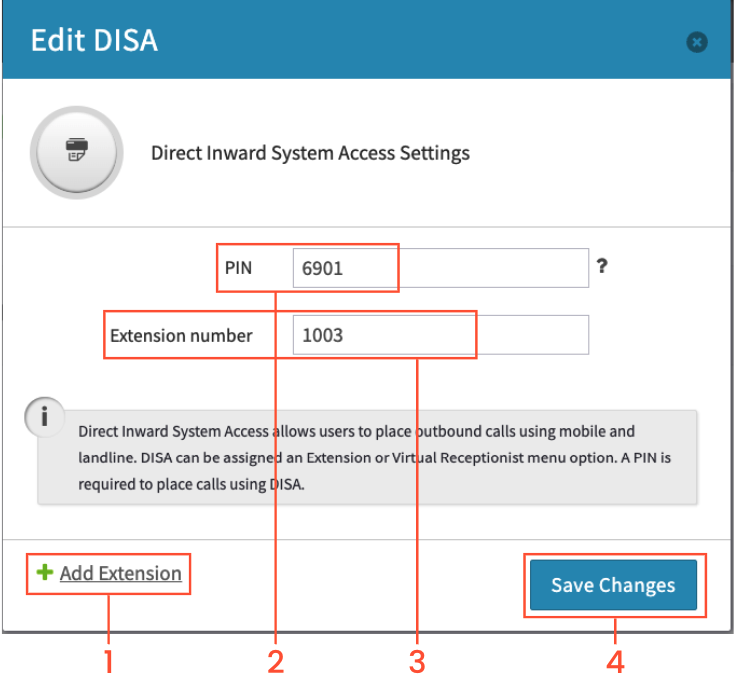
Once enabled - click back in to Direct Inward System Access and choose ‘Edit Settings’
We recommend clicking on Add Extension
You may use the system generated PIN or create your own
Enter an extension number, (we recommend using an extension that is NOT part of your normal number sequence, i.e. if you start with extension 1000, do not use 1020)
Click on Save Changes
### Using DISA
Mobile or landline users can now call into your main number. When they hear the main greeting play they can enter the extension number or menu option for Direct Inward Access if you set one up
They will then be prompted to enter the PIN.
Once the PIN is entered they will hear a dial tone, at which time they will want to enter the phone number they wish to call out to.
 On the next screen, click the Create New Rule button: